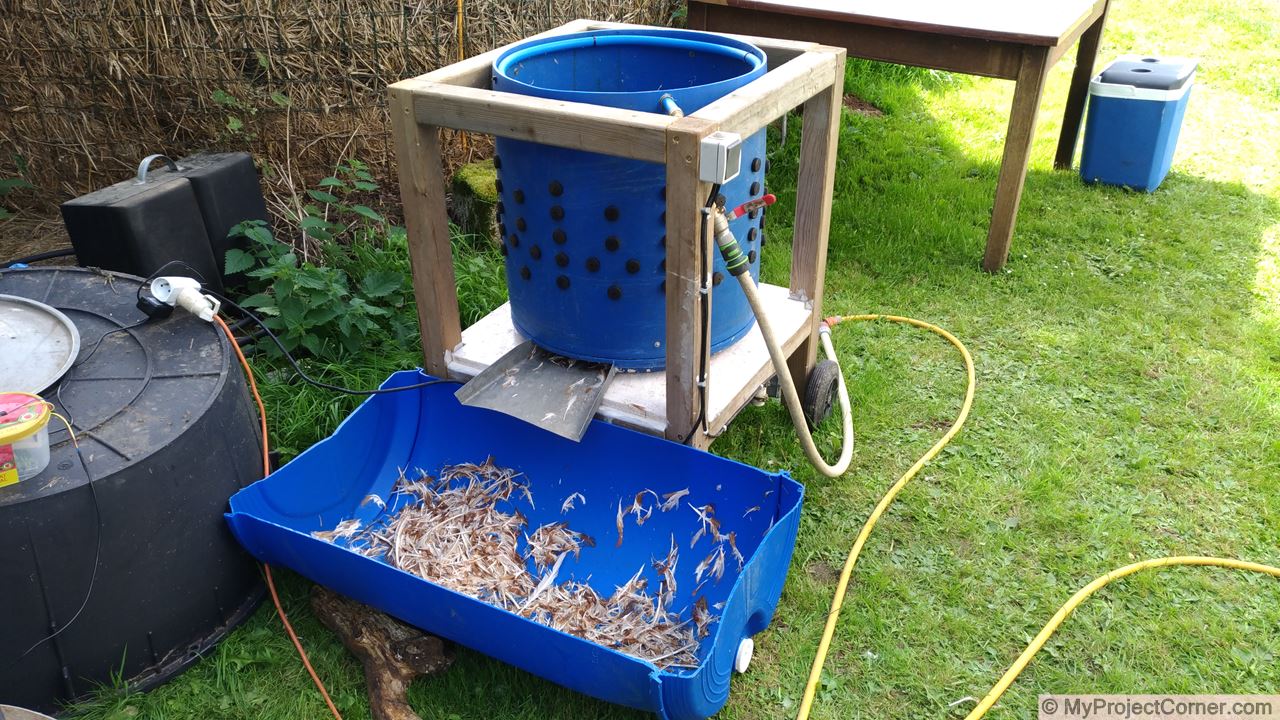
The finished chicken plucker in use
After years of plucking chickens by hand. I finally got motivated to find an alternative method. We process a minimum of 100 home reared table chickens every year, and although no part of slaughtering day is extremely pleasant, the plucking had become the most dreaded (especially by my wife who usually does it).
A mechanical chicken plucker was required!
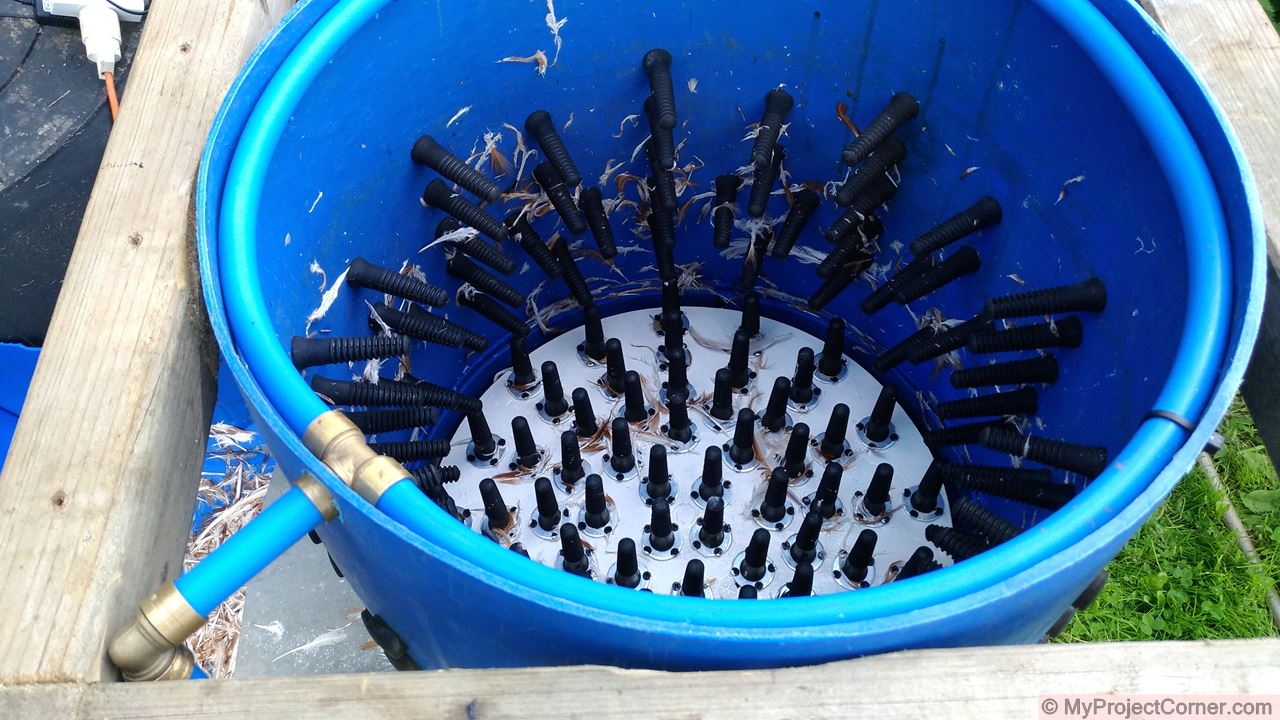
View inside chicken plucker
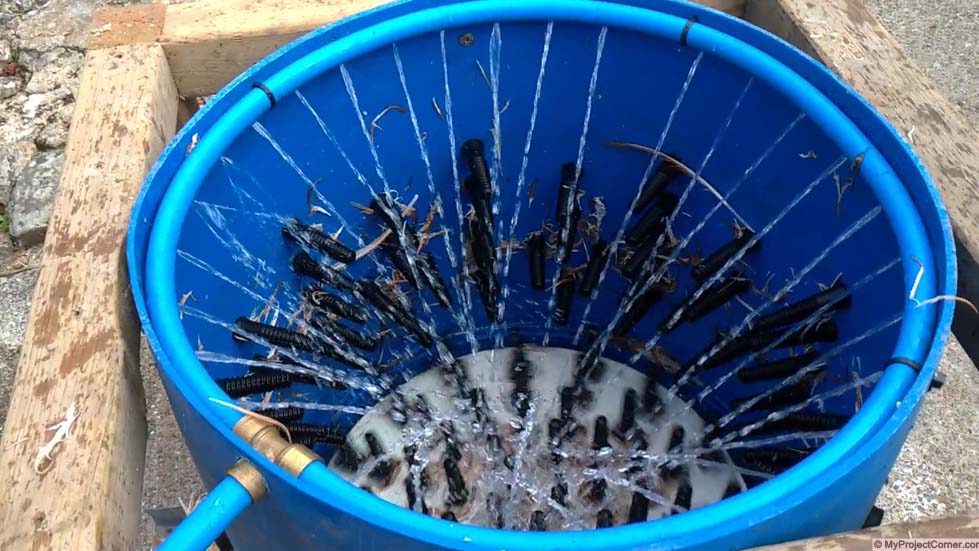
Sprinkler system
I have often looked at mechanical methods for plucking chickens, but the cost of even the most basic machines was far more than I could or would be prepared to invest. Especially as it wasn’t essential. So I thought, lets go homemade. After a bit of googling and YouTube, I decided to try and build a whizbang/drum style plucker. This was the outcome.
Time to process some chickens
A video of the first batch of chickens
This is much better than before, now let’s see how I built it!
The Principle and the Components
How it works and what's needed
A Simple Idea
Instead of removing the chicken feathers with your 10 fingers and thumbs, you use 100 Rubber fingers! You attach a bunch of these rubber fingers to the inside of a stationary drum, and a load more to a spinning disk. Scald the chicken, put it in, and voila no more feathers, well maybe a few it’s not perfect, but it’s really good. I’ve even found that 2 chickens at the same time work as well if not better!
Main Parts
- 220 liter Plastic barrel.
- Rubber Fingers, around 100 needed.
- 220v Electric Motor (0.5 hp worked for my build).
- Large and Small Pulley Wheels.
- 2 Standard Bearings.
- Fence Posts for Framework.
- OSB3 Board ( Although marine ply would be better).
I have tried to use, as much as possible, parts that I had laying around to keep the cost down to a minimum.
The biggest expense for my build was the rubber fingers, which were purchased from burdis.fr
If I hadn’t had the electric motor from an old grain mill, that would have probably been the largest single expense.
Build Stage 1
Building The Framework
Using some pressure treated fence posts I had laying around, I constructed a basic frame with a shelf for the drum to sit on.
The sections are butted and screwed together with 140mm wood screws.
Once the framework was complete, I added a shelf from an offcut of OSB3 18mm thick boarding.
Although OSB3 is resistant to humidity, it doesn’t like to be wet for long periods. It’s not an ideal choice for this application, marine plywood would be better, but I had it to hand so I took the risk. Hopefully, it will last at least a few years.
When constructing the framework I measured my drum at the bottom as opposed to the middle (which is larger). Which meant that the frame was slightly small and had to be adjusted to allow clearance for the barrel.
Build Stage 2
The Finger Plate Assembly
I didn’t’ take any pictures when I was making the finger plate, so I’ll just give a brief explanation of how I made it.

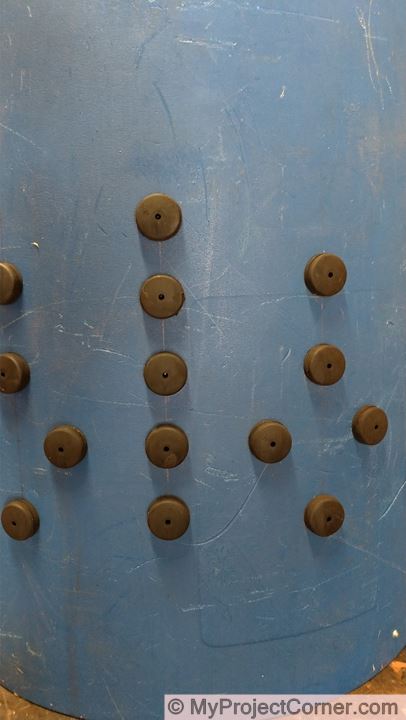
The finished finger plate
As with the mounting shelf, I used an off cut of 18mm OSB3 board
- Cut a disk (I used a router) approximately 4 cm smaller than the inside diameter of the drum (to allow for the feathers to wash away).
- Mark out the position for the rubber fingers.
- Using a 30mm wood drill, drill holes to a depth 12mm (or to suit the dimension of the rubber fingers).
- Prepare the large washers by drilling 4 clearance holes for the screws to be used.
- Drill a centre hole to accommodate the drive shaft.
- At this point, I applied two coats of paint to the plate to ‘waterproof’ it.
- All that is left is to attach the rubber fingers to the plate using the washers, and attach the plate to the drive shaft.
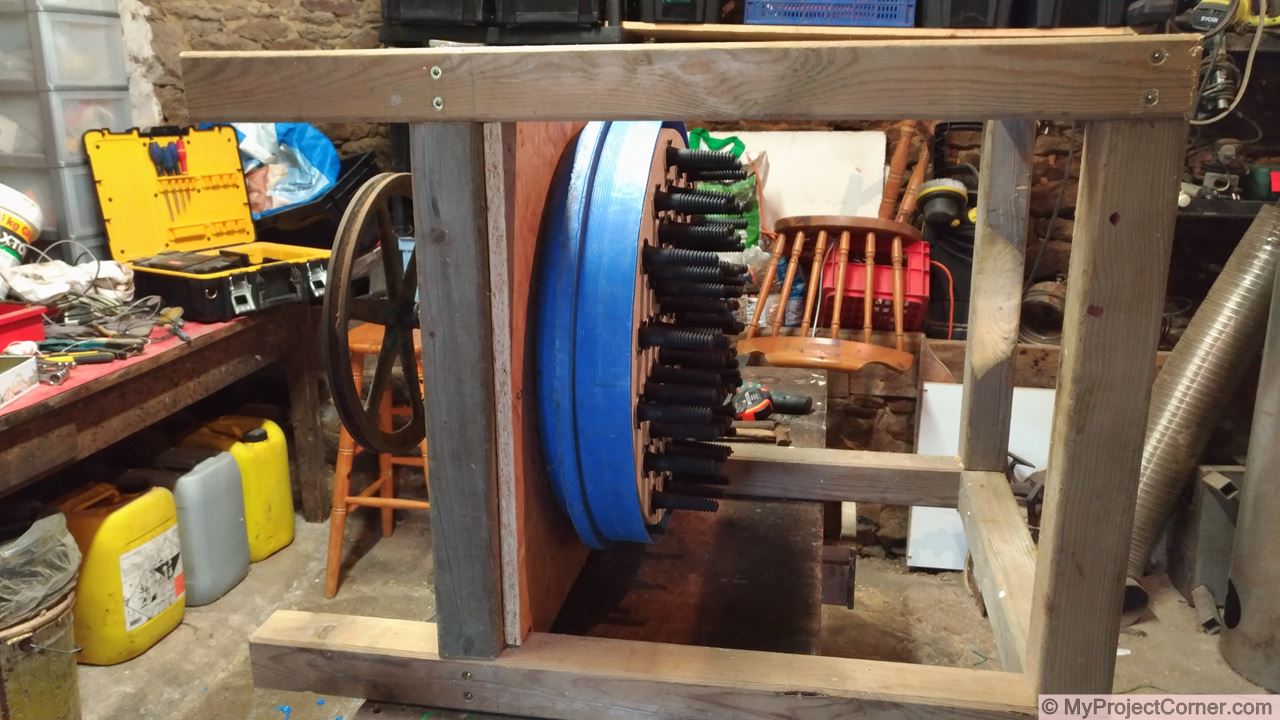
Build Stage 3
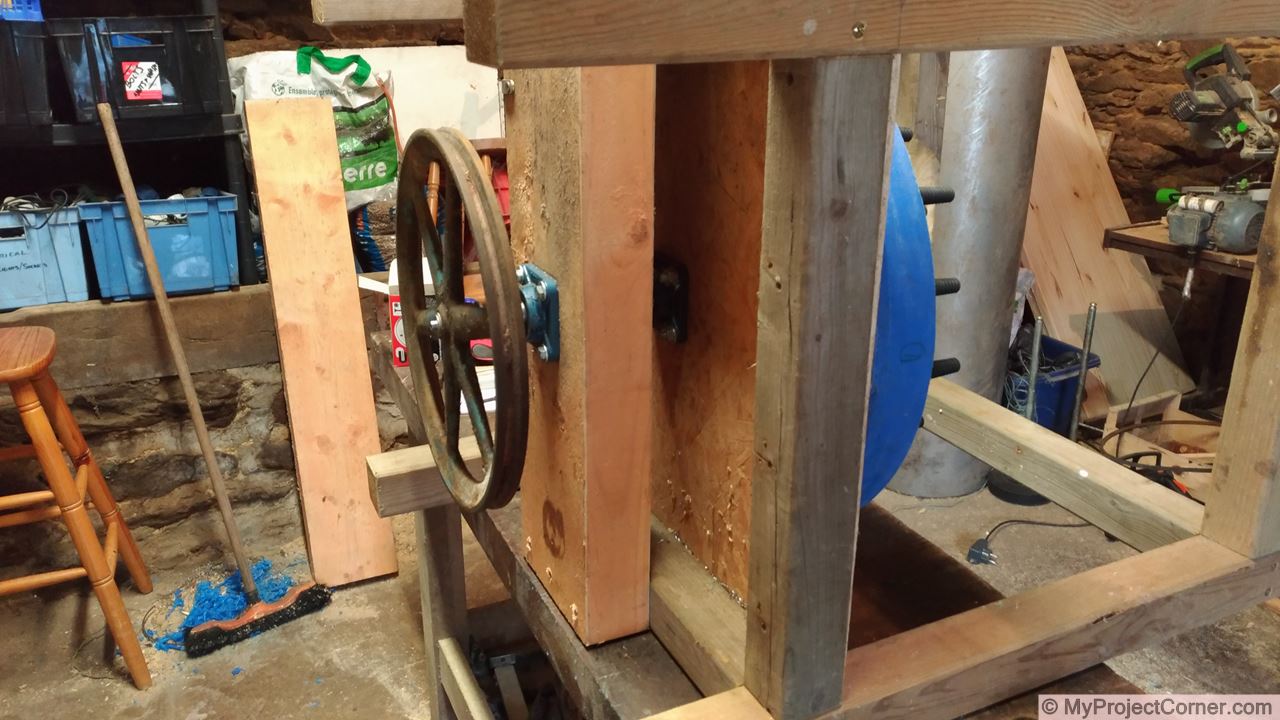
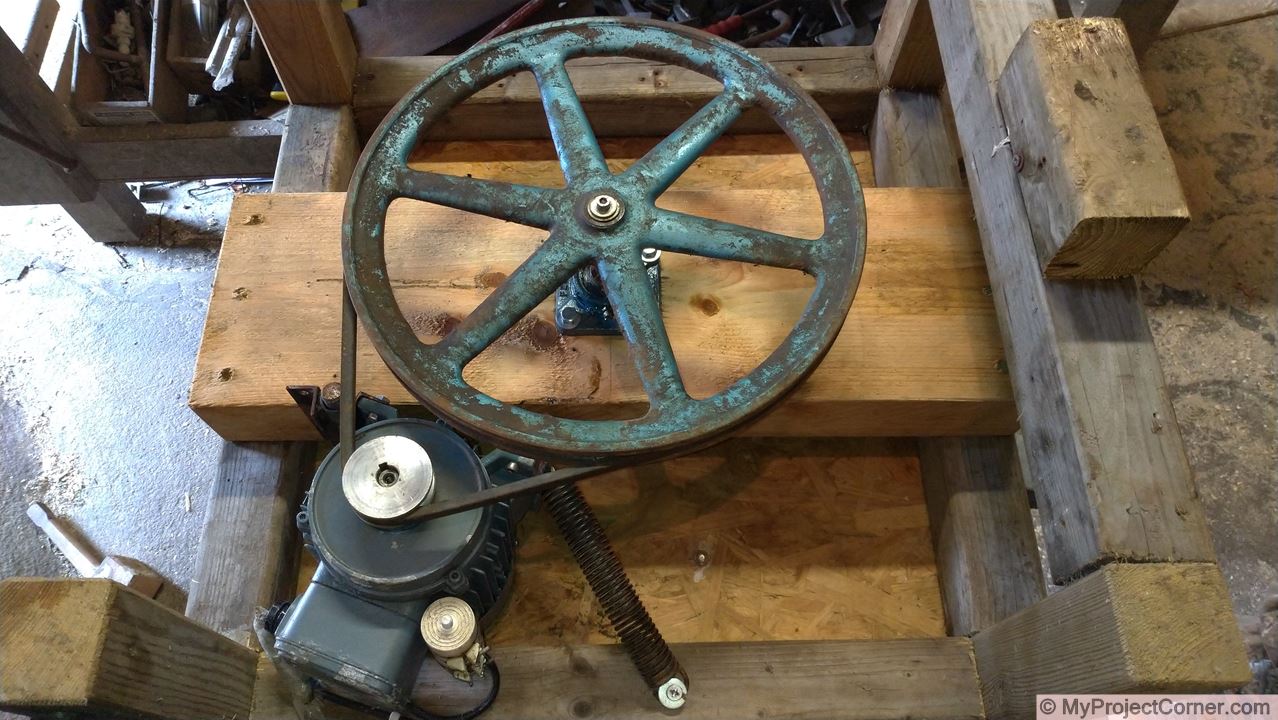
The Pulley and Bearing Assembly
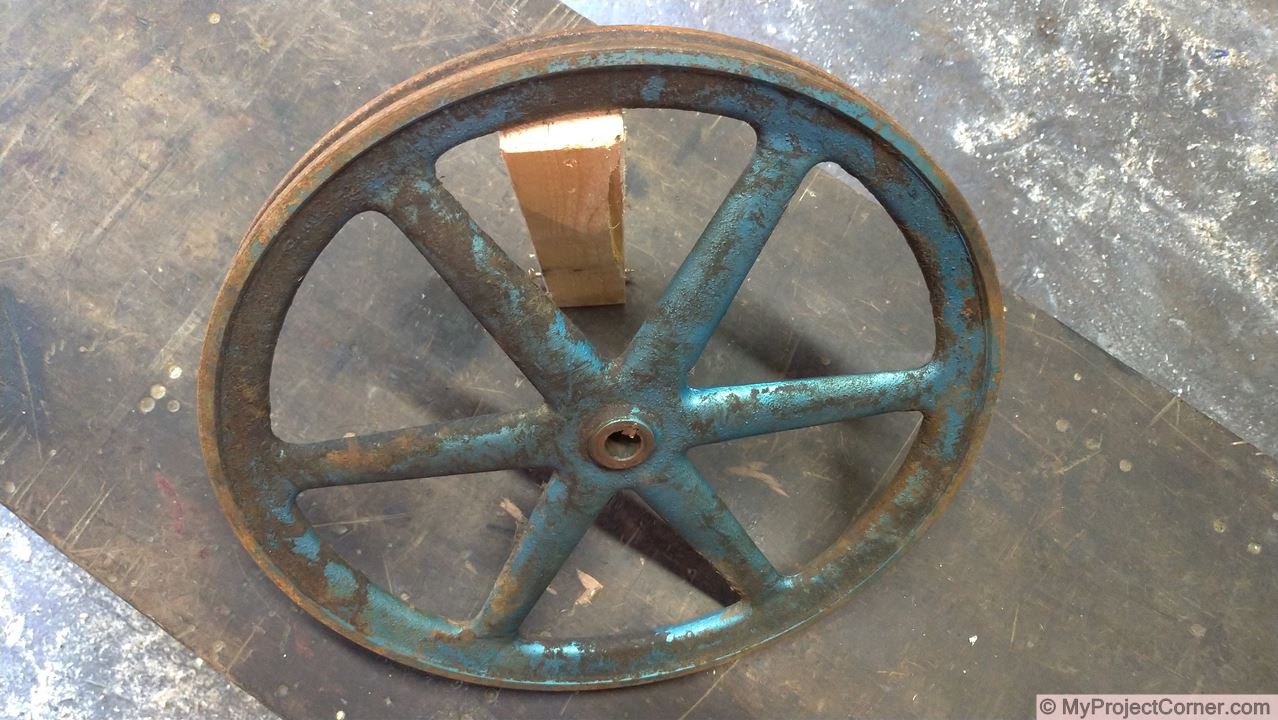
I was very fortunate to find a large pulley wheel on a redundant surface well pump that was in one of the outbuildings when I bought the house, coupled with a small aluminium pulley that was purchased on Amazon, was going to give me the correct rpm needed.
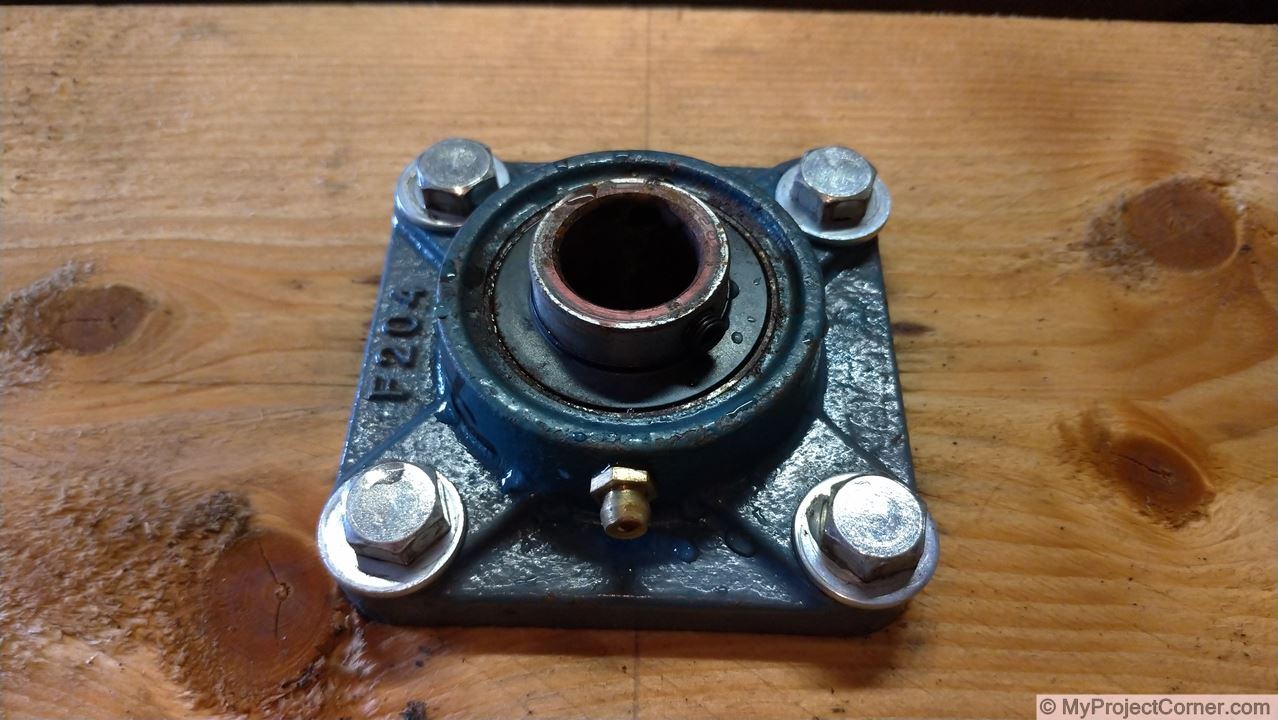
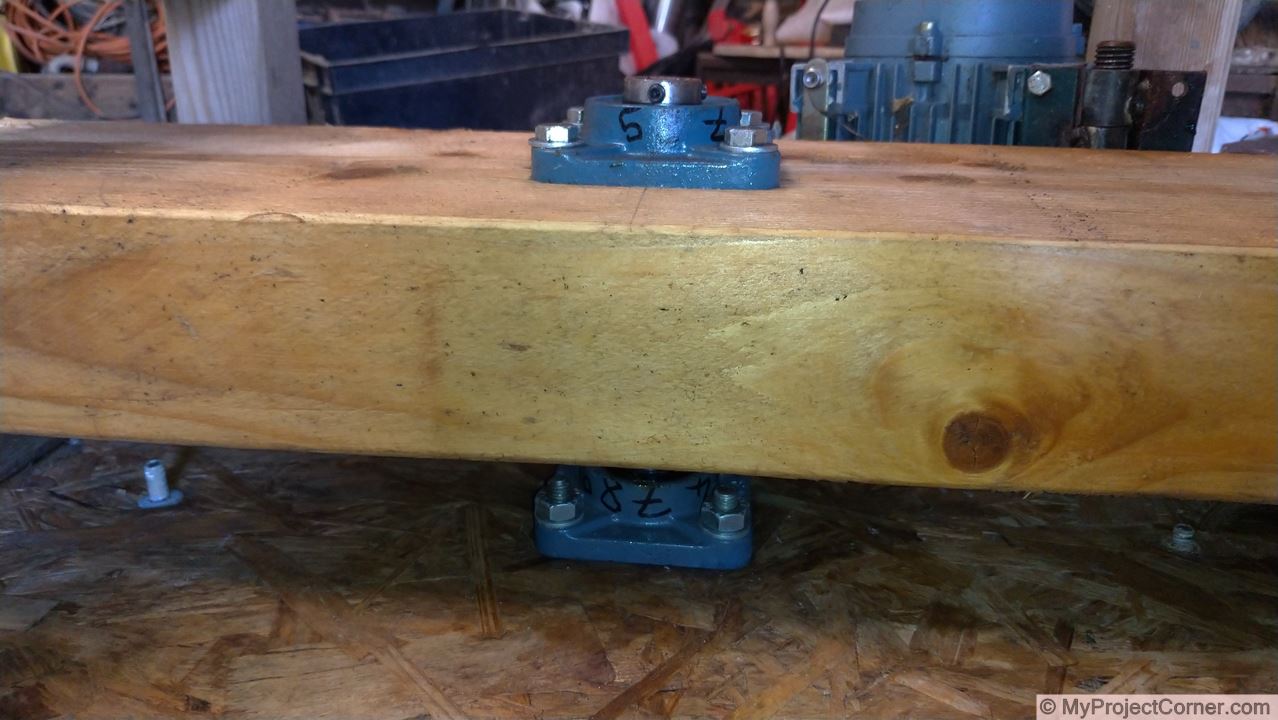
The two bearing units were bought at a local agricultural dealer, they are not sealed bearings, but they were only €18 each. So I need to remember to get out the grease gun from time to time.
The driveshaft was made from an old rusty piece of 20mm steel bar, welded to one end is a steel plate for attaching the finger plate, and the other end was reduced in diameter by a couple of millimeters to fit the pulley.

The Pulley Assembly
Build Stage 4
The Drum/Barrel
On all of the builds that I saw online, the top of the barrel is cut off, the finger-plate is mounted in the bottom and then the rubber fingers are inserted around the circumference of the drum.
I had reservations about doing it this way because if I needed or wanted to dismantle for maintenance/cleaning, all of the rubber fingers around the drum would need to be removed to remove the finger-plate.
Split Barrel Design
The solution I came up with was to section the drum just above the level of the finger-plate and riveting an 8cm strip cut from the top of the drum into the inside bottom of the drum. The strip was necessary because of the taper on the side of the drum.
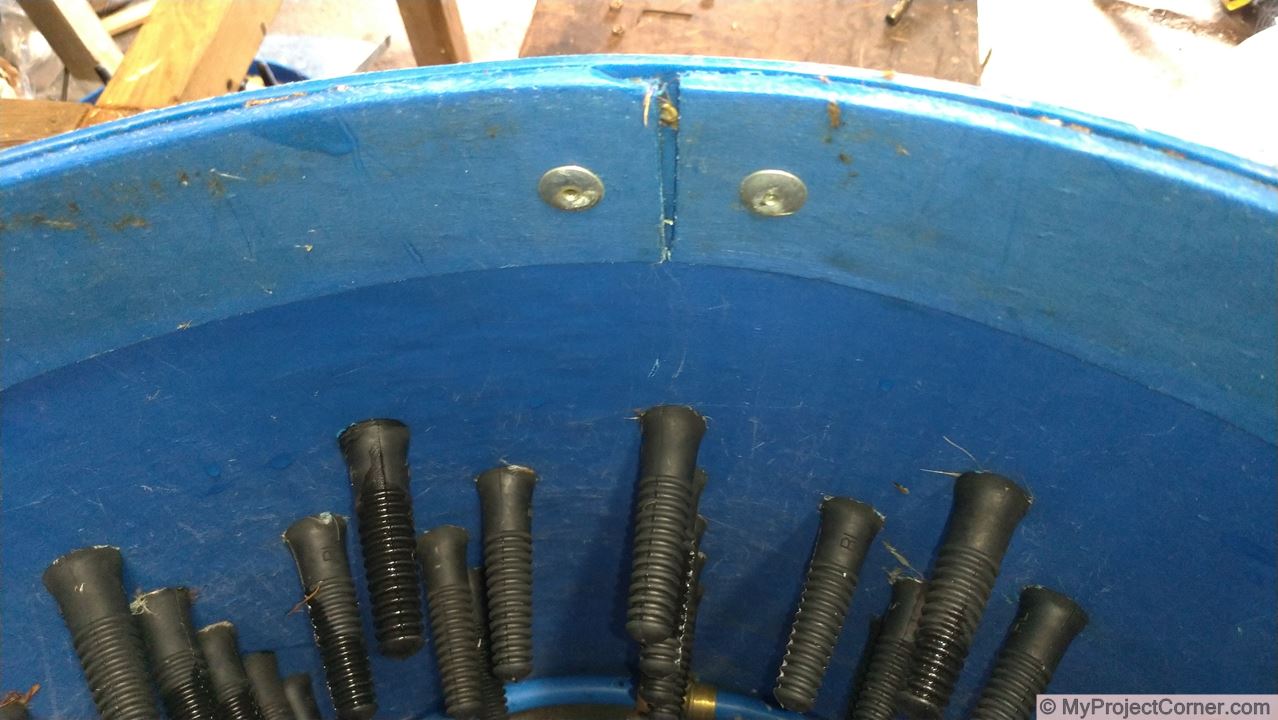
The top part of the drum was then fixed to the frame with four screws. This is a really useful modification as it makes it quick and easy to dismantle, clean and grease up ready for storage over winter.
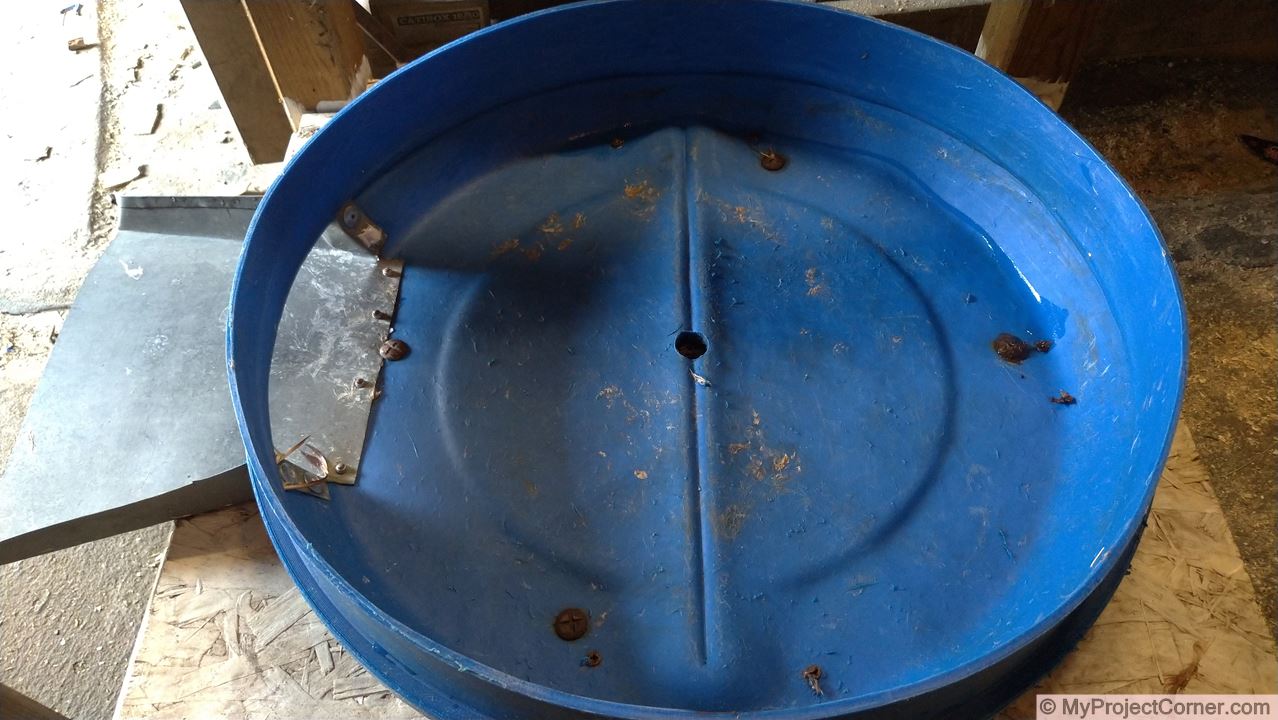
The base of the drum was cut away to allow a chute to be attached, the center hole drilled and then bolted to OSB3 shelf. I made the chute out of a piece of sheet roofing zinc.
The rubber fingers were staggered around the barrel as per the photo, but I don’t know if it makes much difference to the performance of the plucker. I guess it looks nicer than just plain rows.
Build Stage 5
The Electric Motor Drive Assembly
I had an old grain mill that was not being used which had a heavy duty 0.37kw (1/2 HP) motor, articles that I had read suggested that a 3/4 or 1HP motor would be required, but this is what I had so I thought I would give it a go.
The motor does a good job, It handles plucking 2 chickens at a time and a run of 50 chickens in a morning with no problems. As mentioned above the small aluminum pulley was purchased on Amazon, the V belt was a standard size from the French site 123courrior.fr
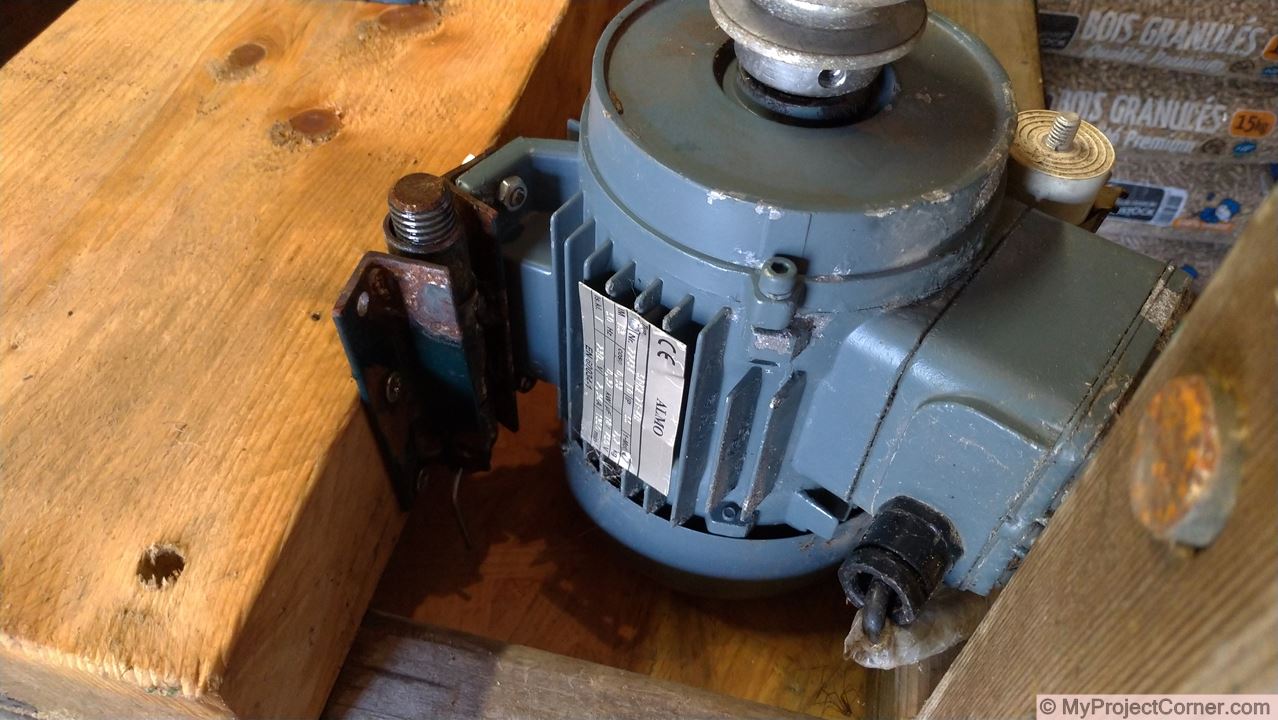
The 0.5 hp motor
I rigged up a hinge and spring to keep the belt in tension. Not very pretty, but it does the job.
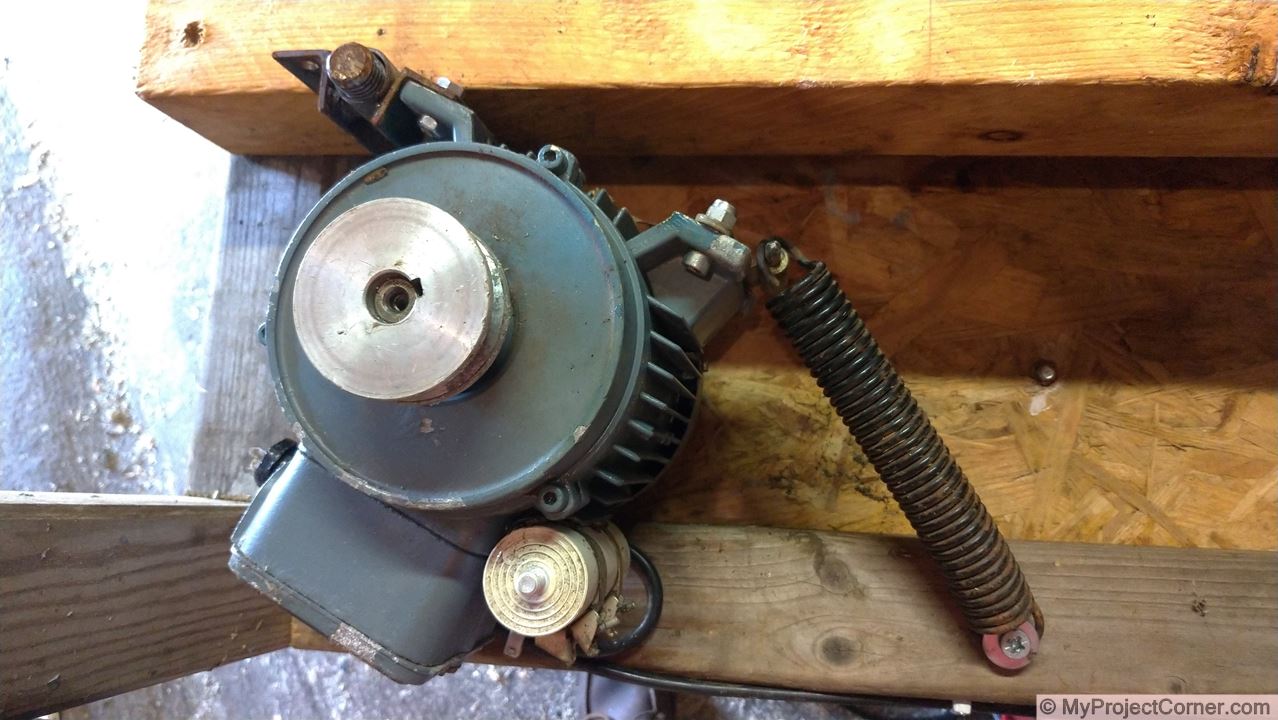
Belt Tensioning Spring
Finished motor and pulley assembly
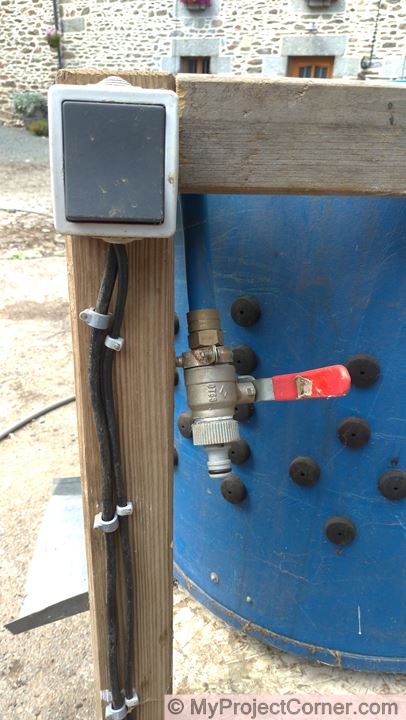
The motor was then wired through a waterproof exterior plastic light switch to a mains supply plug and cable.
Build Stage 6
The Sprinkler Washing System
Sprinkler in operation
A lot of the online builds that I came across used a hose pipe to wash away the removed feathers, I decided to go for an integrated system for my home-made chicken plucker. This consisted of a length of 20mm diameter PER water pipe formed to the inside diameter of the top of the drum, a ‘T’ connector, a 90° connector, a 1/4 turn tap and a hose attachment.
Once the pipe has been attached to the drum with cable ties I drilled 3mm holes, spaced 5cm apart, around the inside circumference at an angle of about 45°. Having this set up means that I can be scalding a chicken while the plucker is plucking, which speeds up the process when I’m on my own.
Final Stage
Making the Chicken Plucker Mobile
Didn’t realize how heavy my home-made chicken plucker would be, so I decided to add a couple of wheels to the back legs. This way I could tip it up and move it around like a wheelie bin, as it happens I found some wheelie bin wheels and axles at the local car boot sale, perfect.
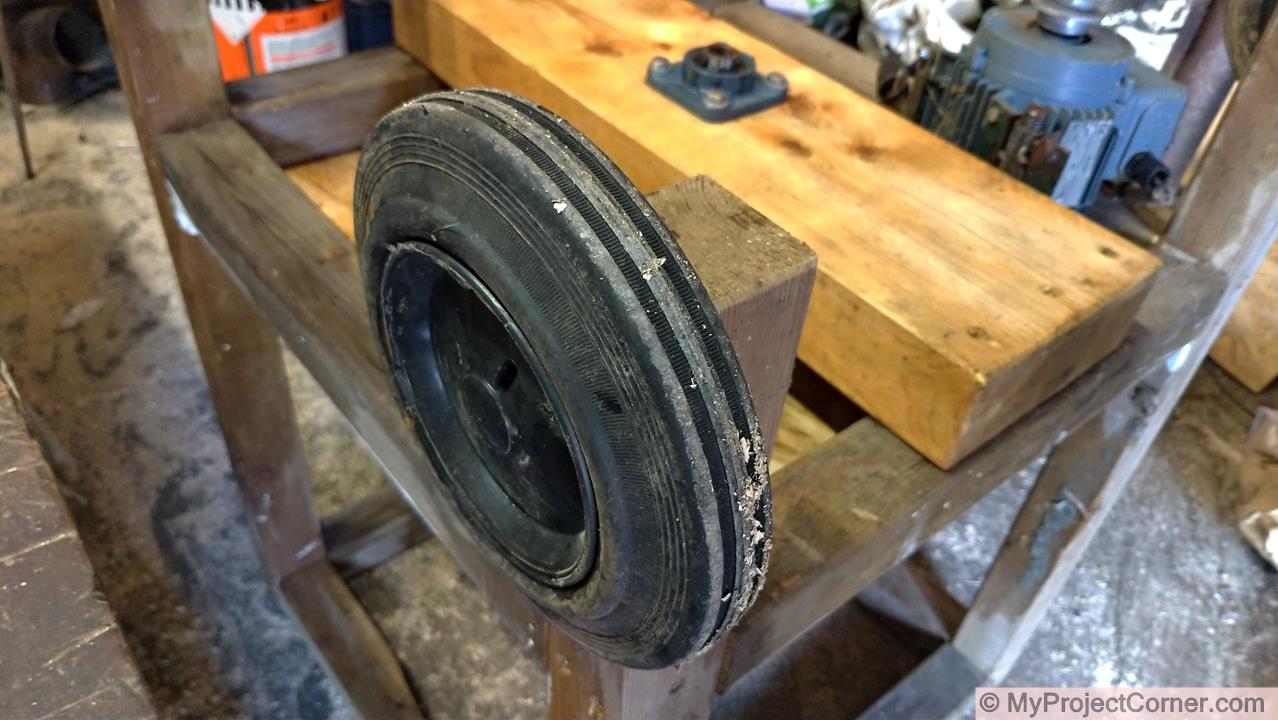
Adding some wheels
Let's Give It A Go
Here's a video of the first trial
As you can see from the first trial the results are pretty impressive!