Building up the layers
Having worked on a farm for a number of years, I’ve often noticed the large amount of steam coming off of the cow manure heap. This lead me to wonder if it would be possible to recover this heat and put it to good use (heating my house for instance).
After a fair bit of research online I came across various attempts to put this idea into practice, although the results of these projects tended to be fairly vague I decided to have a go.
Construction Materials
- Straw (a big round bail)
- Manure - 3 cubic meters
- Sawdust - 2 bags
- Wood Chips - 11 cubic meters
- Wooden Posts -
- Wire Fencing - 25m
- 25mm PE Pipe - 200m in 50m lengths
- 100mm Drainage Pipe - 50m length
First Stage
Produce lots of wood chips
The Main Component - Wood Chips
I calculated that I was going to need 11 m3 of wood chips. That meant that I would need a serious machine to do the chipping.
This one was available for hire at a cost of €250 for the weekend. It wasn’t sure we need it for the whole weekend, but as we had to cut some of the wood to feed it, better be safe than sorry.
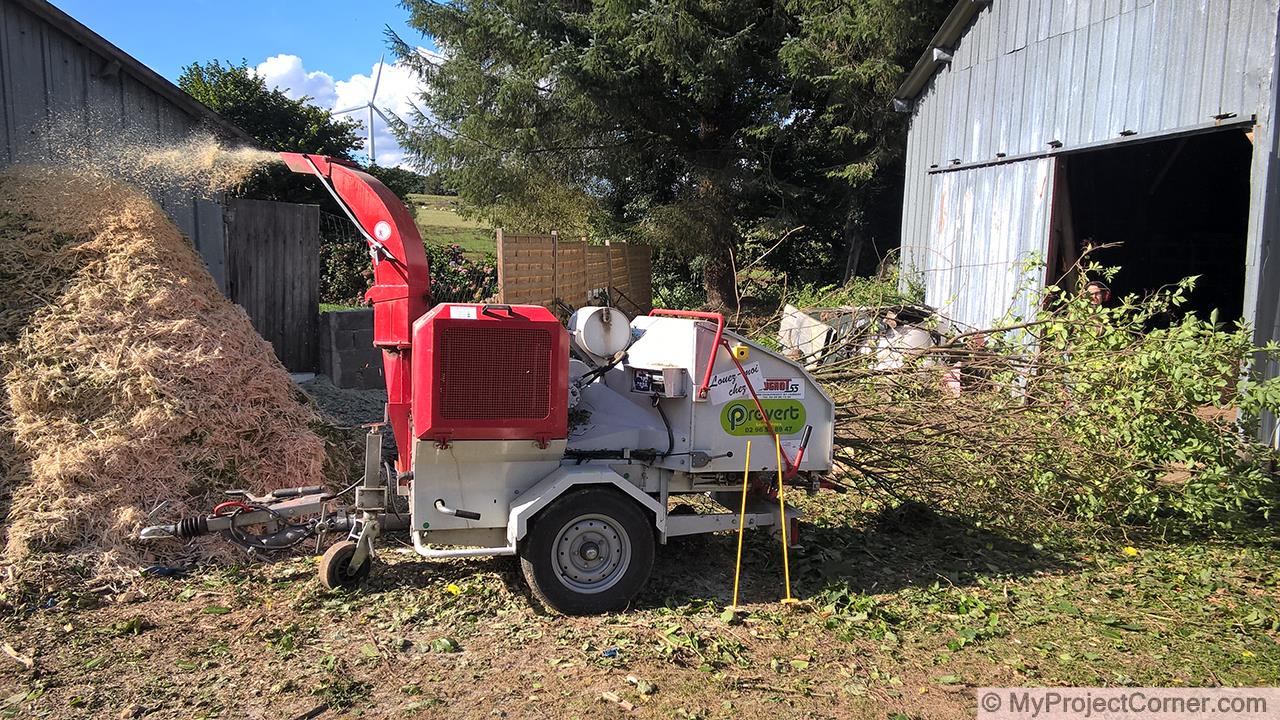
The wood chipper in action
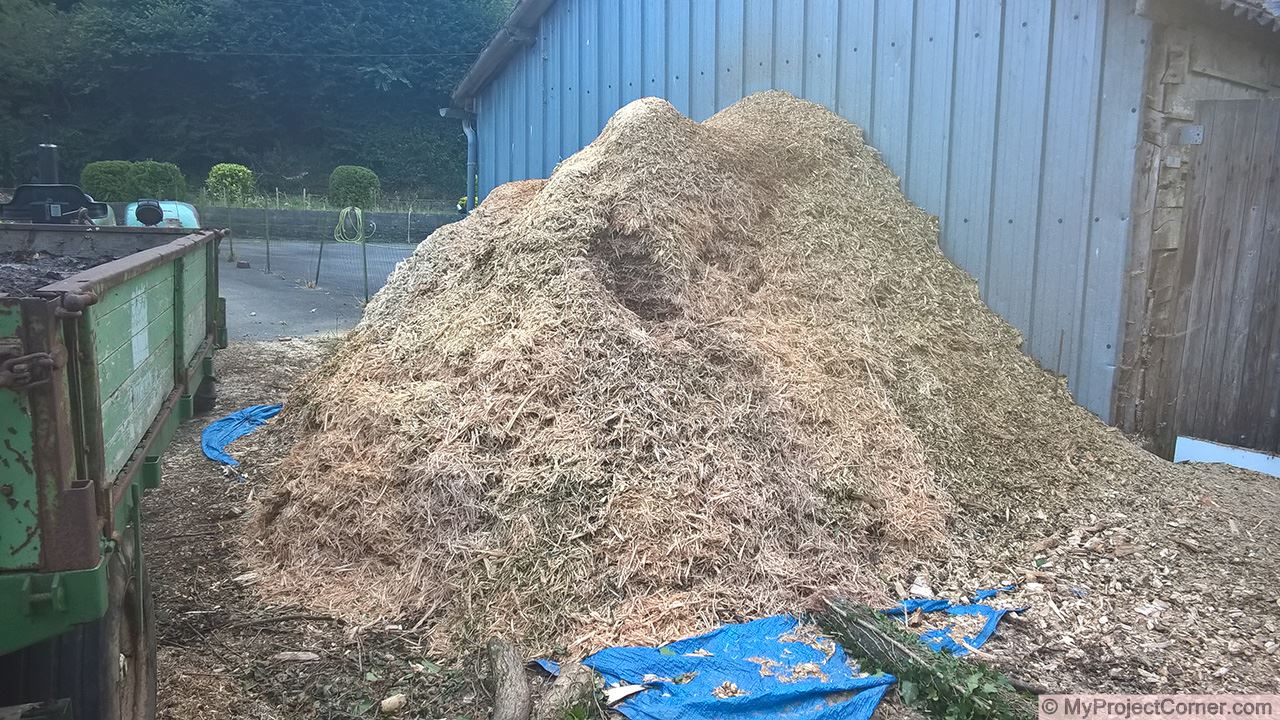
Finished pile of wood chips
I had quite a lot of one year old cut branches to use, but this was to be mixed with freshly cut branches with leaves, the hope was that the green leaves would help to kick start the composting process.
The chipping was completed in a day and a half and I think that I could have done it in a day if needed.
Second Stage
Laying out and starting the build
Laying Out The Area
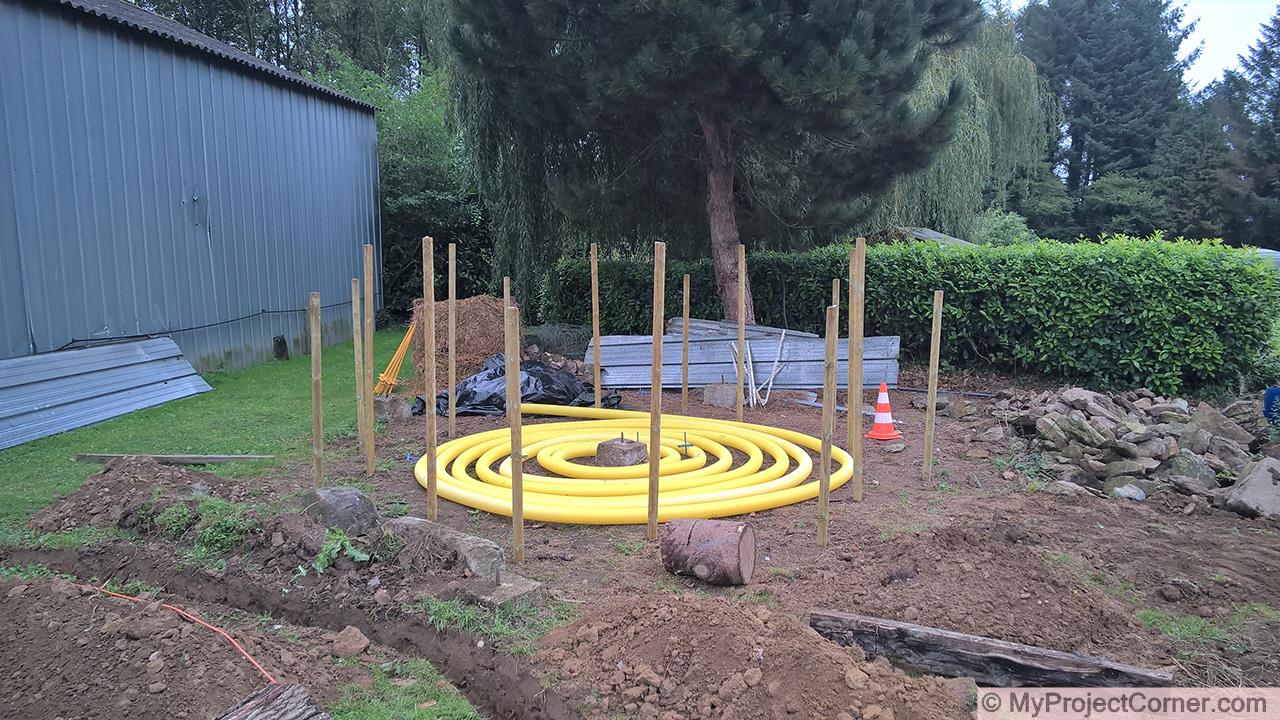
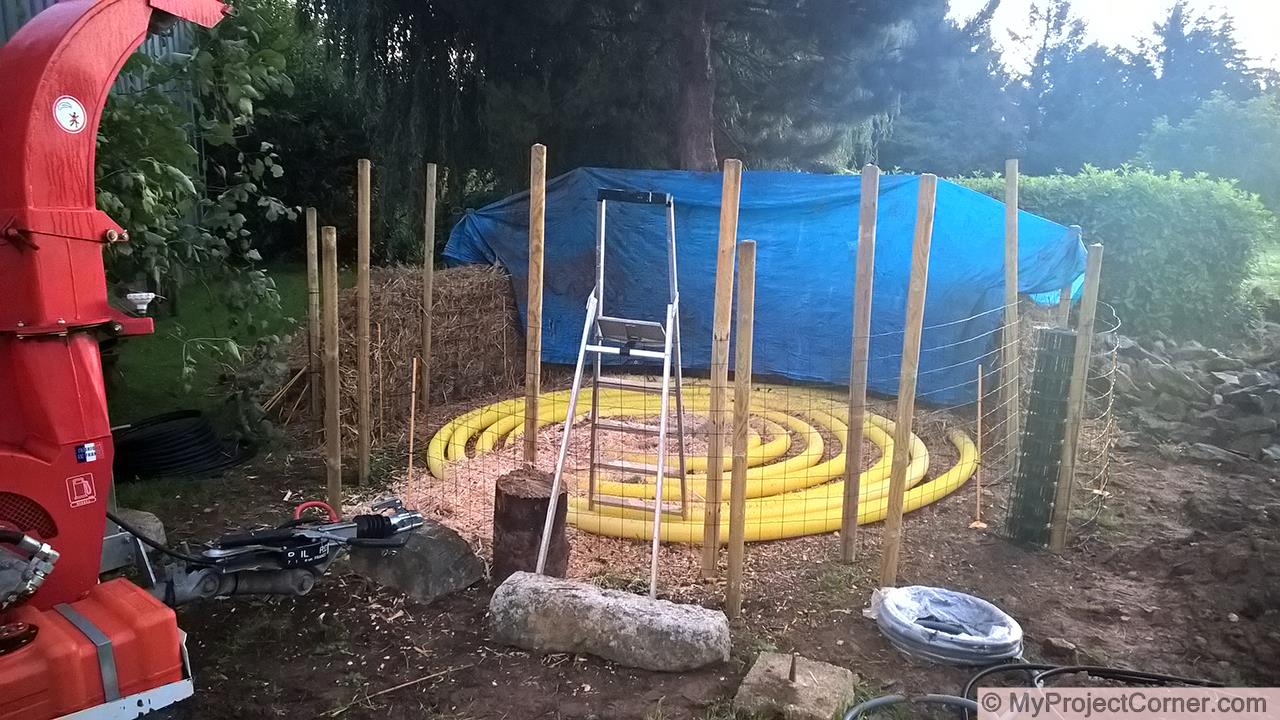
The compost heating system pile was going to be 4m diameter including a 0.5m layer of straw around it for insulation. After marking out the diameters I evenly spaced 16 pressure treated 8cm posts around the two circles.
Next was to coil the 100mm drainage pipe on the base, in the inner circle. 50 meters of pipe was perfect. This would allow aeration of the pile from underneath.
The first layer
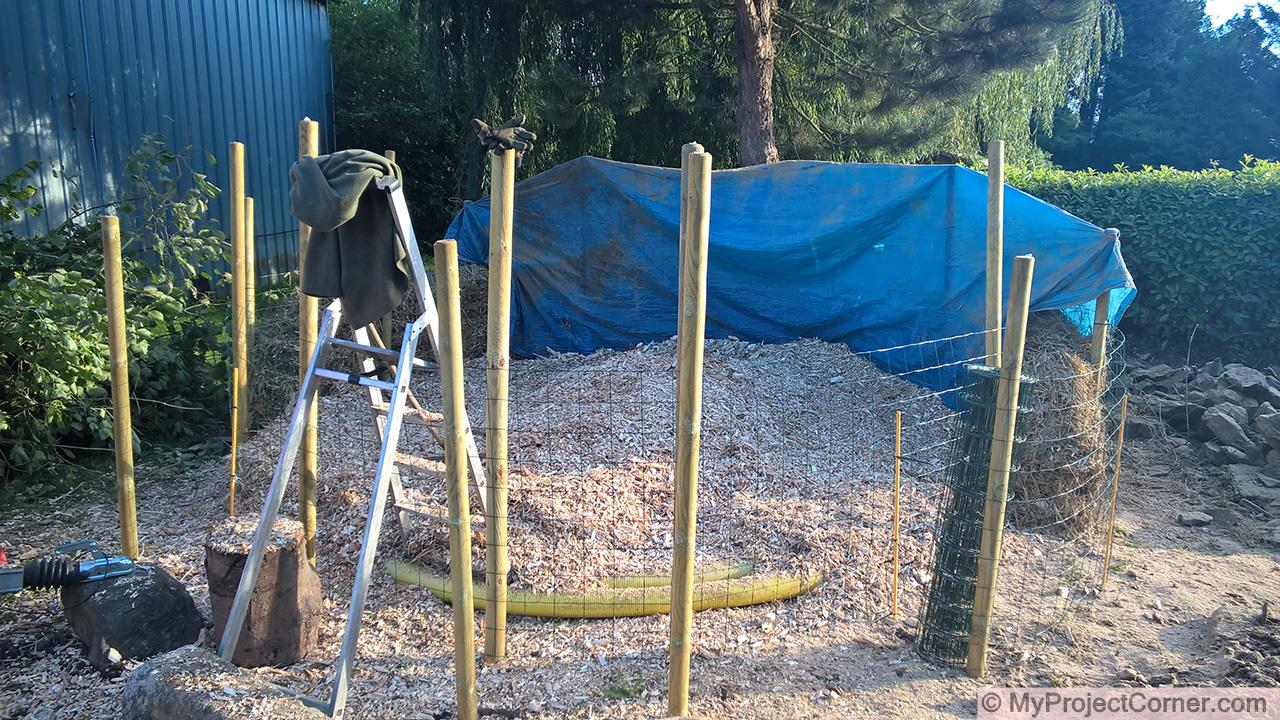
Then the cheapest garden fencing that I could find was wrapped around the two sets of posts. After, started to fill the gap between the two fences with straw.
Using the wood chipper to blow directly onto the aeration pipe I filled the first layer (around 40cm) with the driest wood that I had. I didn’t want this layer to compost so that air could pass through it. The blue sheet in the photo was to stop the wood chips for going everywhere.
Start adding wood chips
Build Stage Three
Layering the compost pile
Building up th layers
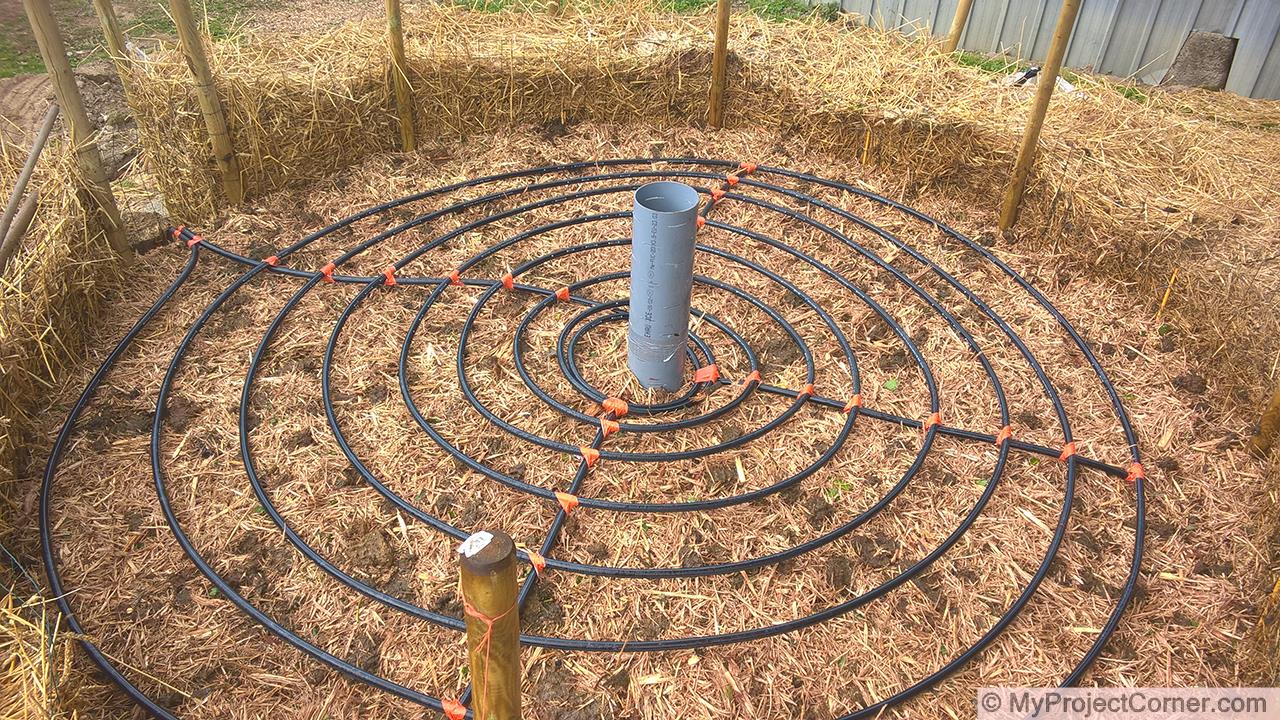
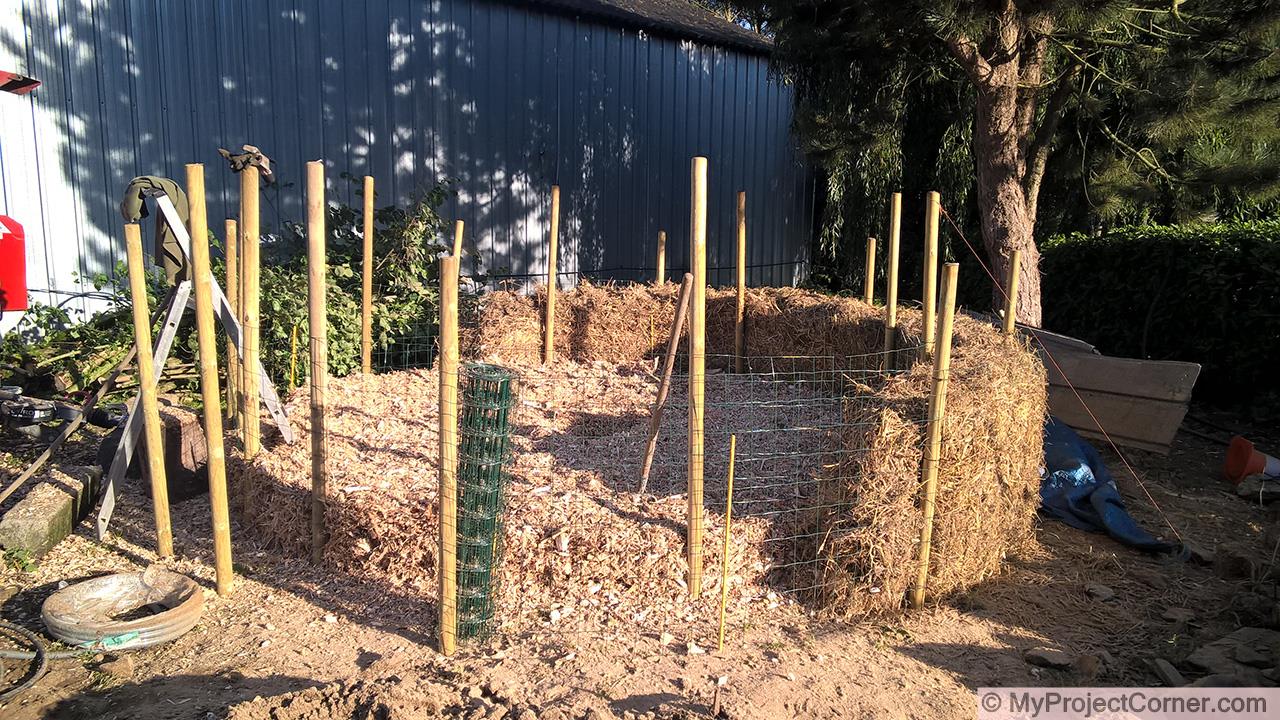
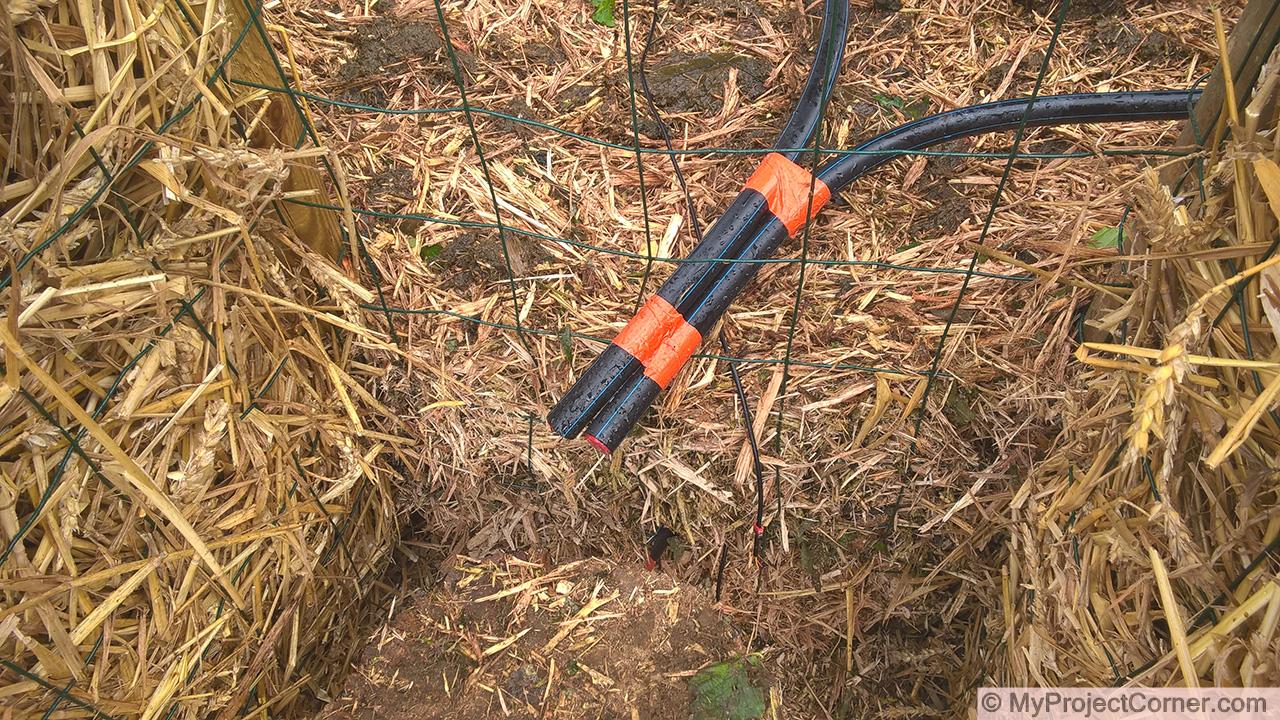
I had decided not to have any pipe connections in the compost pile itself, so came up with the idea of having individual coils in each layer.
I purchased the pipe in 50m lengths which worked out really well, as you can see from the photo.
The first layer
The advantage of this method is that I could make up the coils the week ahead. This made it really quick to assemble the pile, with three of us we had it finished in under a day.
Once the base layer was finished we filled the outside straw insulation layer. Leaving a gap of around 60cm for access and connection of the pipes.
Gap for access
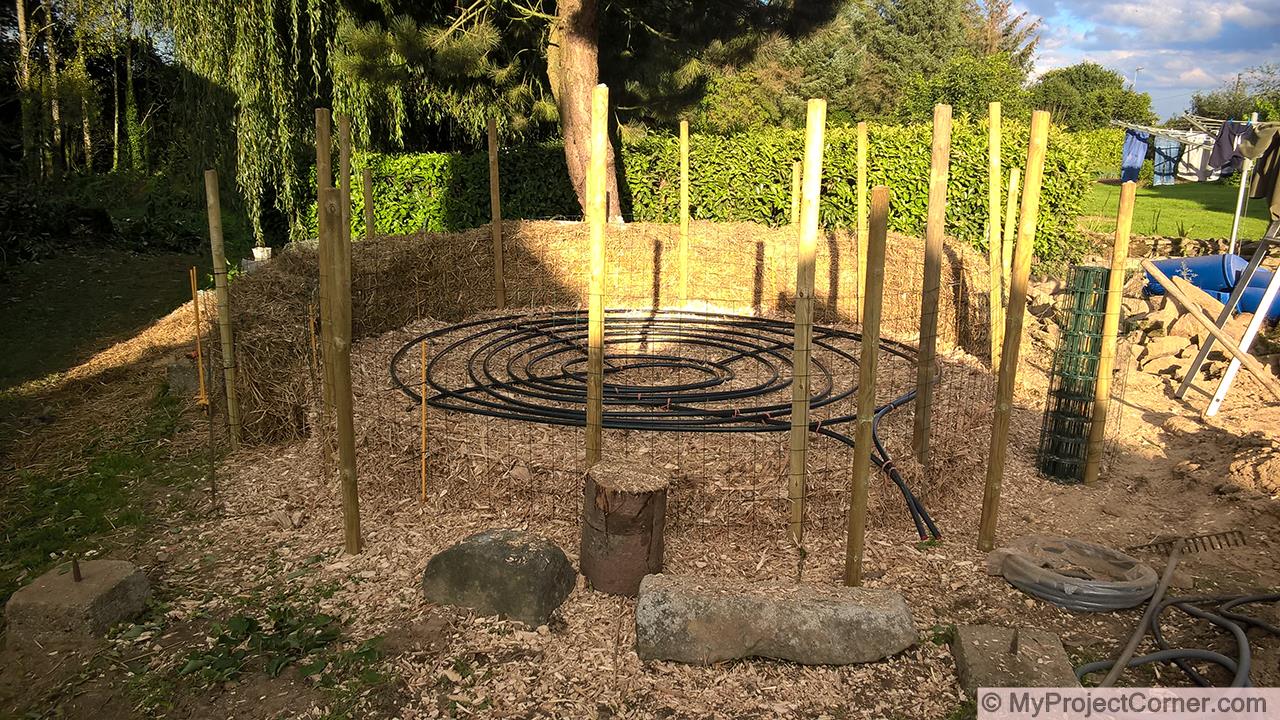
Each layer consisted of 30 to 40cm of mixed wood chips, manure and sawdust and a good soaking of water. I added a 20cm central pipe with slots cut in it, also aimed at improving aeration of the finished pile.
I also added a waterproof DS18B20 One Wire Digital Temperature Sensor at each level to allow for monitoring of the pile with a Raspberry Pi.

Layering the pile

The finished compost pile
Final Stage
Connecting the compost heating system
I used plastic water pipe connectors to join the different layers to produce one length of continuous pipe.
And I buried the supply and return water pipes (in an insulated tube) in the bottom of a trench, and also ran mains electricity and a cat5 cable to the pile (for the Raspberry Pi).
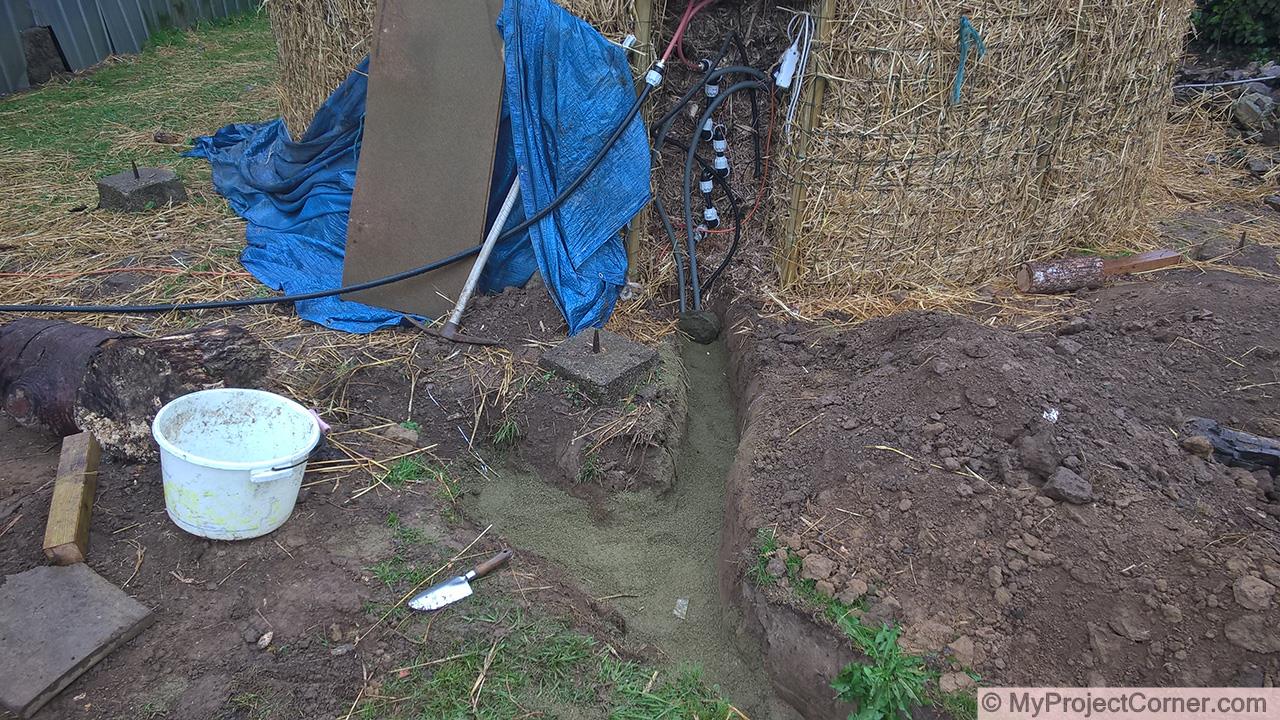
After purging the most of the air in the system using mains pressure water supply, it was connected to the underfloor heating system. I installed a dedicated circulating pump to run the system.
The temperature sensors were connected to a Raspberry Pi which was to be used to monitor the temperature of the compost heating system and turn on/off the circulating pump.
Results and conclusions of my compost heating system