Automated Green Laser Bird Scare
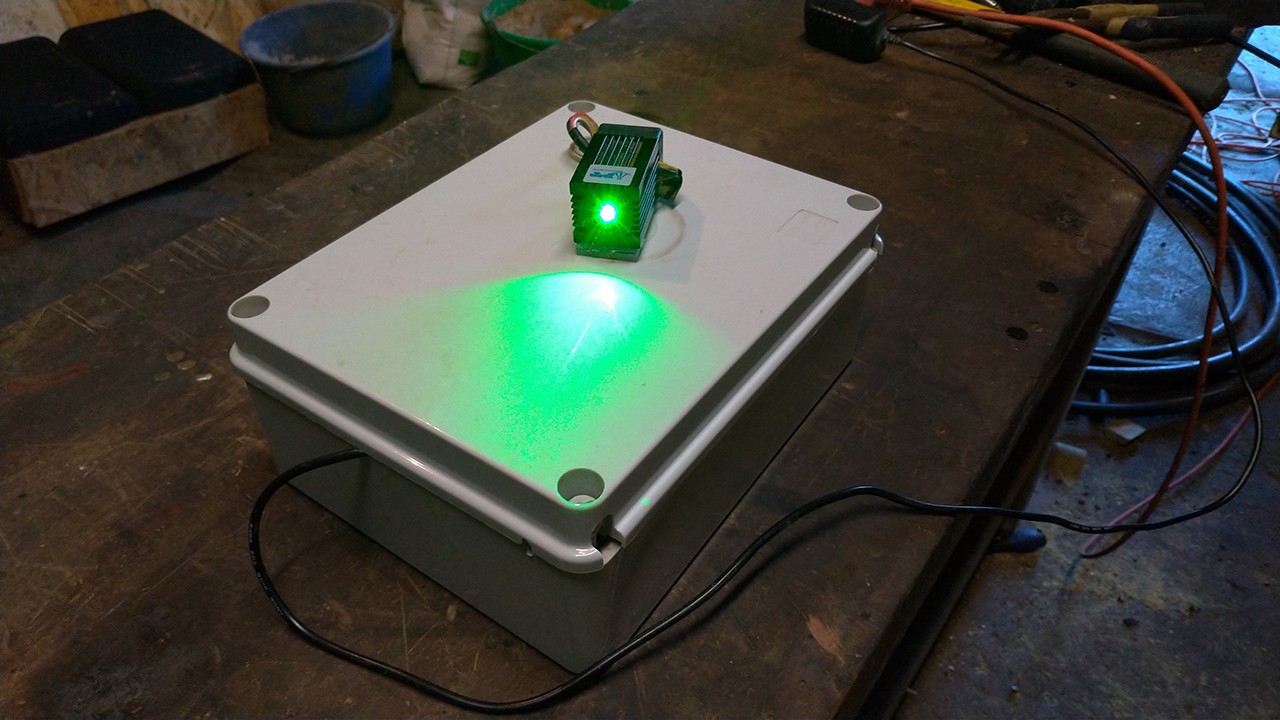
Building a green laser bird repellent using an Arduino Uno and some basic hobby electronics. Used to deter the winter starling invasion in the cow sheds.
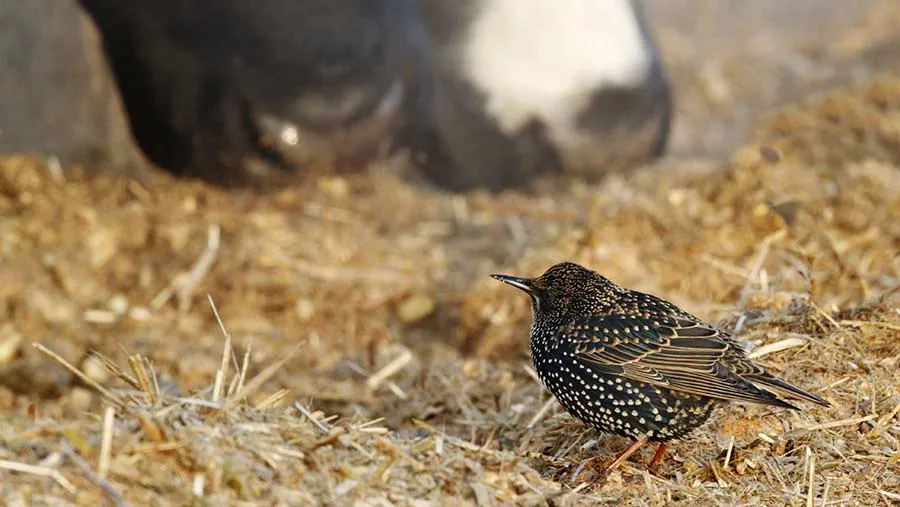
My solution for the starling problem at the farm
Every year around September/October, along with the maize silage harvest, comes the invasion of starlings. This is a major problem in the cow shed, not only do they consume the best part of the silage, the grains of maize, but they also leave unpleasant and potentially dangerous deposits of excrement over the cows food and equipment. The solution was a high power green laser.
When looking at ways do scare them away, I came across an article mentioning that birds in general are afraid of high intensity light, especially green light. First step was to buy a couple of green laser pointers, it’s amazing how well it worked. For a couple of seasons (just until March) I would regularly go round the farm scaring away the birds. Although not completely eradicating the problem, it reduced it greatly as the large majority of starlings moved on elsewhere.
However, it did demand a fair bit of time. That’s when I decided to automate the process, I began by just putting a laser on a timer. But soon found out that the light needed to be moving to get the desired affect and also to cover the whole cow shed. So this is what I came up with, an automated laser bird scare.
Components used to construct the laser bird scare
Main parts for the build
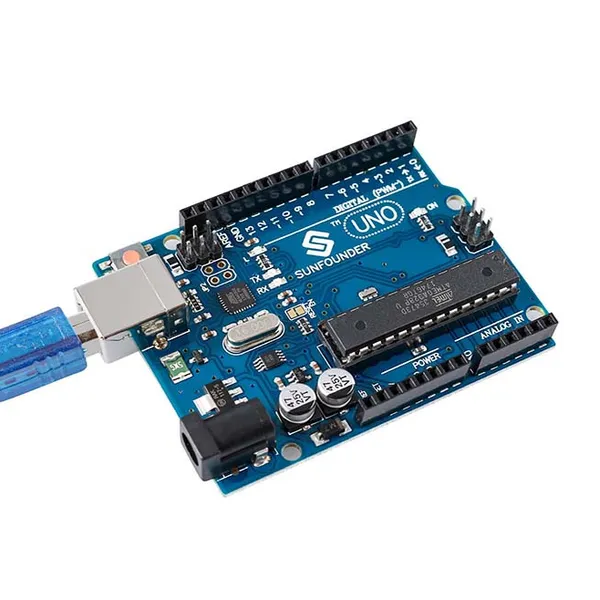
- Arduino Uno, I used a generic Sunfounder Uno as I had to keep costs to a minimum
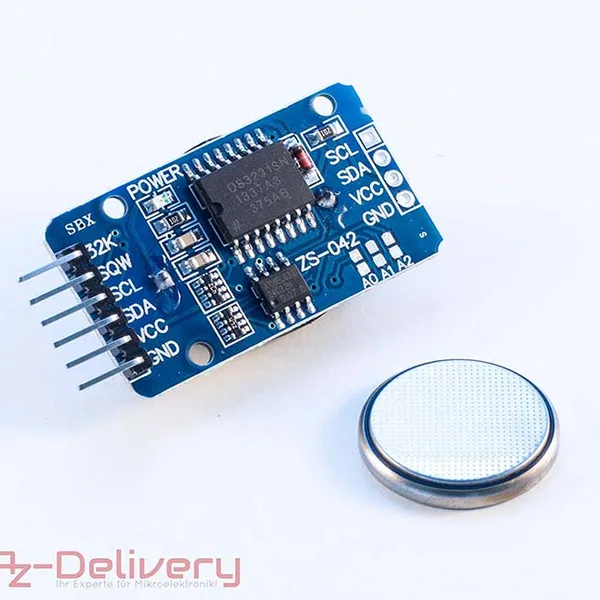
- I2C real time clock module – RTC DS3231
- Relay 5v low level trigger
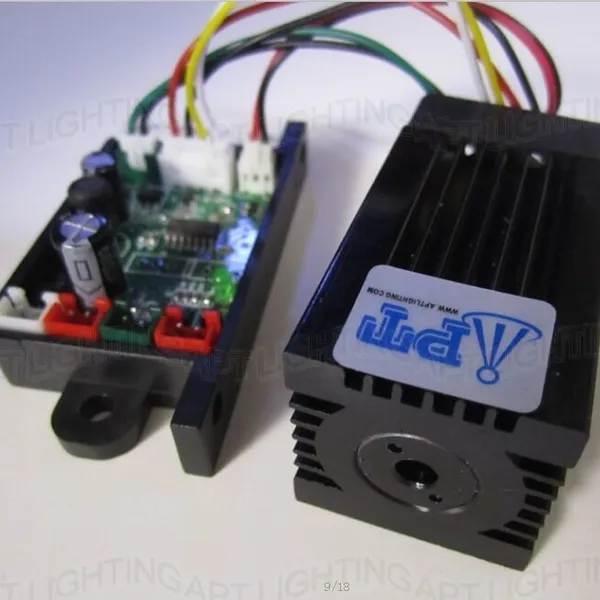
- High power green laser unit was ordered from AliExpress
- Stepper motor 5V 28BYJ-48 & Driver Board ULN2003
- Waterproof Enclosure 240 x 190 x 90mm with hinged lid
- 9v power supply for Arduino Uno
- Mini breadboard SYB-170
Miscellaneous parts
- Dupont connecting wires
- Hot glue sticks
- Off cut laminate flooring for base board
- I also used a small piece of plexiglass and some small screws and nuts to mount the laser unit onto the stepper motor, If I was to rebuild the units I would replace the plexiglass with a 3D printed mounting plate.
I built 2 of these automated laser bird scare boxes, one for each cow shed at the farm. The cost of all of the components came in at just under €100 per unit and I spent about a day for the assembly and the set up of both boxes.
I’ve tried to use readily available parts for my automated laser bird scare, the only item which may be difficult to replace (if needed) is the laser unit. I should have maybe bought a spare at build time, but being the most expensive item the budget wouldn’t allow it. Hopefully I’ll never need a replacement.
Assembling the box of bits
I decide to use an Arduino Uno as the controller because I only wanted it to run a small amount of code and be easy to use, just plug it in and away it goes. That way anybody could move or set up the box in another place if required.
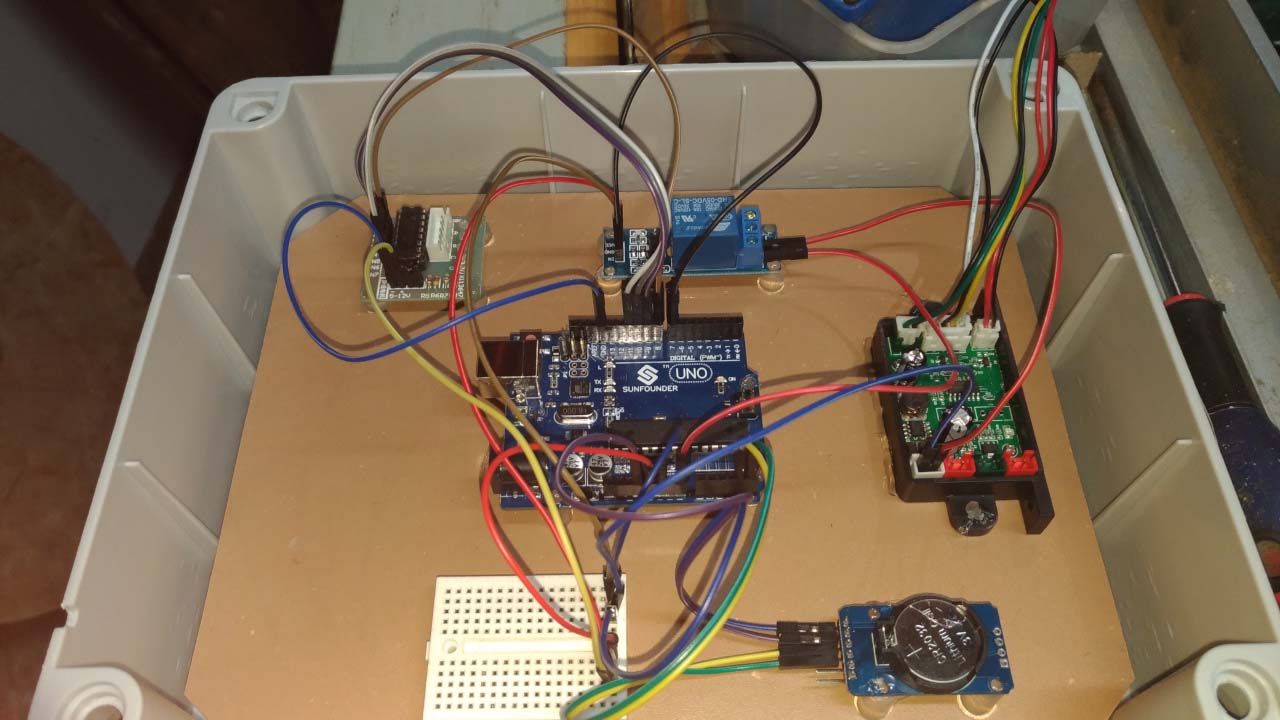
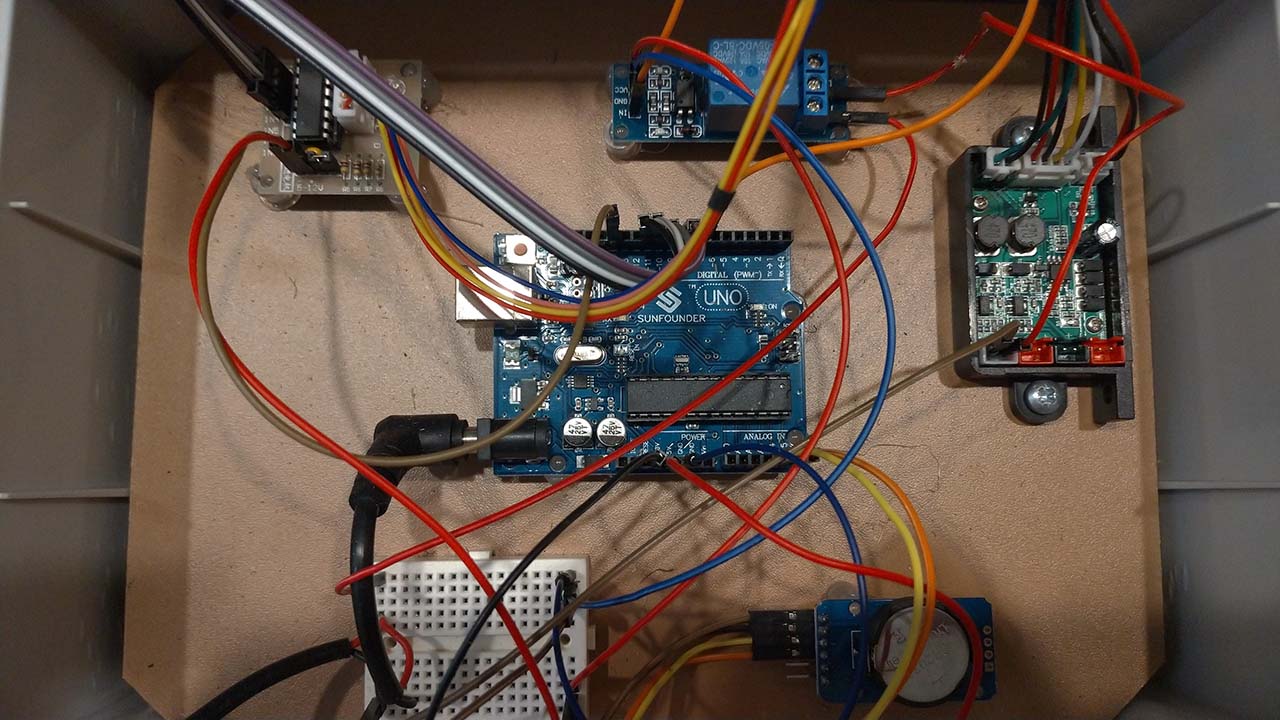
I constructed using very simple methods, the electronics mounting plate is an off cut of laminate flooring which I trimmed to fit snugly in to the bottom waterproof box.
I then arranged the components on the board and marked the positions with a pencil, then remove the components and using a 3mm drill I drilled holes 4mm deep on the pencil marks.
Then cutting a glue stick into 8mm lengths I proceeded to hot glue these bits over the drilled holes, all except the laser controller board. Once the glue had cooled, I placed and hot glued the components one by one on top of these ‘glue stick pillars’. The laser controller board was attached directly to the base plate in the same manner.
The stepper motor was attached in the center of the lid using small countersunk screws.
The mini bread board was stuck on using it’s own sticky.
Although this is a very ‘DIY’ assembly, all the parts are still in place and working after 2 years of use and I’m happy with the time saved as opposed to a screwed assembly option.
Coding and connecting
The Arduino Code
I’ve mixed together various snippets of example code to produce something that works, the goal of the code is to get the servo to turn the laser through a predefined angle at regular intervals throughout the day. The sweeping effect of the laser allows for a larger area to be covered and also makes it more effective.
The Arduino sketch.
// Real time module
#include "Wire.h"
#define DS3231_I2C_ADDRESS 0x68
// Convert normal decimal numbers to binary coded decimal
byte decToBcd(byte val)
{
  return( (val/10*16) + (val%10) );
}
// Convert binary coded decimal to normal decimal numbers
byte bcdToDec(byte val)
{
  return( (val/16*10) + (val%16) );
}
// Stepper motor set up
const int IN1=11;
const int IN2=10;
const int IN3=9;
const int IN4=8;
// Relay set up
const int relayPin =7; //the "s" of relay module attach to
const char tab1[] =
{
  0x01, 0x03, 0x02, 0x06, 0x04, 0x0c, 0x08, 0x09
};
const char tab2[] =
{
  0x01, 0x09, 0x08, 0x0c, 0x04, 0x06, 0x02, 0x03
};
void setup()
// Stepper motor & relay
{
  pinMode(IN1, OUTPUT);
  pinMode(IN2, OUTPUT);
  pinMode(IN3, OUTPUT);
  pinMode(IN4, OUTPUT);
  pinMode(relayPin, OUTPUT); //initialize relay as an output
  digitalWrite(relayPin, HIGH); //disconnect the relay
// Real time module
  Wire.begin();
  Serial.begin(9600);
  // set the initial time here:
  // DS3231 seconds, minutes, hours, day, date, month, year

  // Un-comment following line to set current time (change values), once set comment out again and re-upload

 //setDS3231time(00,52,23,3,3,1,18);
void loop()
{
  byte second, minute, hour, dayOfWeek, dayOfMonth, month, year;
  // retrieve data from DS3231
  readDS3231time(&second, &minute, &hour, &dayOfWeek, &dayOfMonth, &month, &year);
    // send it to the serial monitor
  Serial.print(hour, DEC);
  // convert the byte variable to a decimal number when displayed
  Serial.print(":");
  if (minute<10)
  {
    Serial.print("0");
  }
  Serial.print(minute, DEC);
  Serial.print("--");
  delay(1000);
   {
      if (hour > 8 and hour < 18)
    {
      if (minute == 10 or minute == 20 or minute == 30 or minute == 40 or minute == 50 or minute == 0)
        {
          LaserOn();
        }
    }

  }
}
void ctlStepMotor(int angle, char speeds )
{
  for (int j = 0; j < abs(angle) ; j++)
  {
    if (angle > 0)
    {
      for (int i = 0; i < 8; i++)
      {
        digitalWrite(IN1, ((tab1[i] & 0x01) == 0x01 ? true : false));
        digitalWrite(IN2, ((tab1[i] & 0x02) == 0x02 ? true : false));
        digitalWrite(IN3, ((tab1[i] & 0x04) == 0x04 ? true : false));
        digitalWrite(IN4, ((tab1[i] & 0x08) == 0x08 ? true : false));
        delay(speeds);
      }
    }
    else
    {
      for (int i = 0; i < 8 ; i++)
      {
        digitalWrite(IN1, ((tab2[i] & 0x01) == 0x01 ? true : false));
        digitalWrite(IN2, ((tab2[i] & 0x02) == 0x02 ? true : false));
        digitalWrite(IN3, ((tab2[i] & 0x04) == 0x04 ? true : false));
        digitalWrite(IN4, ((tab2[i] & 0x08) == 0x08 ? true : false));
        delay(speeds);
      }
    }
  }
}
void StepMotorStop()
{
  digitalWrite(IN1, 0);
  digitalWrite(IN2, 0);
  digitalWrite(IN3, 0);
  digitalWrite(IN4, 0);
}

void LaserOn()
{
  digitalWrite(relayPin, LOW); //Close the relay
  {
    for (int i=1; i<=2; i++)
    {
        ctlStepMotor(120, 10);
        StepMotorStop();
        delay(1000);
        ctlStepMotor(-120, 10);
        StepMotorStop();
        delay(1000);
    }
        digitalWrite(relayPin, HIGH); //Open the relay
        delay(30000);
    }
}

void setDS3231time(byte second, byte minute, byte hour, byte dayOfWeek, byte
dayOfMonth, byte month, byte year)
{
  // sets time and date data to DS3231
  Wire.beginTransmission(DS3231_I2C_ADDRESS);
  Wire.write(0); // set next input to start at the seconds register
  Wire.write(decToBcd(second)); // set seconds
  Wire.write(decToBcd(minute)); // set minutes
  Wire.write(decToBcd(hour)); // set hours
  Wire.write(decToBcd(dayOfWeek)); // set day of week (1=Sunday, 7=Saturday)
  Wire.write(decToBcd(dayOfMonth)); // set date (1 to 31)
  Wire.write(decToBcd(month)); // set month
  Wire.write(decToBcd(year)); // set year (0 to 99)
  Wire.endTransmission();
}
void readDS3231time(byte *second,
byte *minute,
byte *hour,
byte *dayOfWeek,
byte *dayOfMonth,
byte *month,
byte *year)
{
  Wire.beginTransmission(DS3231_I2C_ADDRESS);
  Wire.write(0); // set DS3231 register pointer to 00h
  Wire.endTransmission();
  Wire.requestFrom(DS3231_I2C_ADDRESS, 7);
  // request seven bytes of data from DS3231 starting from register 00h
  *second = bcdToDec(Wire.read() & 0x7f);
  *minute = bcdToDec(Wire.read());
  *hour = bcdToDec(Wire.read() & 0x3f);
  *dayOfWeek = bcdToDec(Wire.read());
  *dayOfMonth = bcdToDec(Wire.read());
  *month = bcdToDec(Wire.read());
  *year = bcdToDec(Wire.read());
}
I wanted to do a Fritzing diagram for the wiring up, but never quite found the time. So I’ve listed the connections as best as possible.
Wiring up the Components
Here’s how I wired the laser bird scare:
Stepper Motor Controller
- IN1 – Arduino Uno Pin 8
- IN2 – Arduino Uno Pin 9
- IN3 – Arduino Uno Pin 10
- IN4 – Arduino Uno Pin 11
- Power + to Breadboard Shared 5v
- Power – to Arduino Uno GND
Real Time Clock Module
- SCL – Arduino Uno Pin A5
- SDA – Arduino Uno Pin A6
- VCC – Arduino Uno 3.3v
- GND to Breadboard Shared Ground
Relay
- IN – Arduino Uno Pin 7
- VCC to Breadboard Shared 5v
- GND to Breadboard Shared Ground
- Output:
- Laser Controller Board
- Breadboard 9v Input
Laser Controller Board
- Connected to Breadboard Input Ground and Relay
Power Supply
- Split at Breadboard to supply 9v to Arduino and to Laser
Here's a video of it working in my shed
I used the laser bird scare device for 3 winters and although it did not get rid of the starlings completely, it definitely reduced the numbers. The main advantage was that the birds would not stay in the cow sheds overnight.
Also, it would continue working the weekends when I didn’t.