Raspberry Pi 'Work From Home' Time Recorder
Over the past year, I have had the opportunity to work from home. For which I needed to keep track of the hours that I work.
Starting by using an excel spreadsheet and entering the ‘clock-in’ and ‘clock-out’ times manually, I soon found this to be quite tedious.
Why I Made This
Part of the problem with working from home is keeping track of time worked. My work times are flexible, I’m not constrained to ‘office’ hours, and I like to take advantage of it.
This means that I will often work for a period of time and then, for example, take the dog for a walk or go and feed the hens. Or if the weather is nice spend the afternoon in the garden, and then work in the evening.
This makes it difficult to keep track of how long I work during the day. What I needed was an easy way of recording my work from home hours.
I have a Raspberry Pi on my desk which is running my webserver(not this site), and so decided to set up a work time recording solution using it. Along with a few components from my son’s Arduino starter projects kit.
Hardware I Use
- Raspberry Pi 4 - 4 gb
Arduino Components
- 450ohm resistor x3
- 2 LED
- Mini button
- Breadboard
- Dupont connectors
What it does
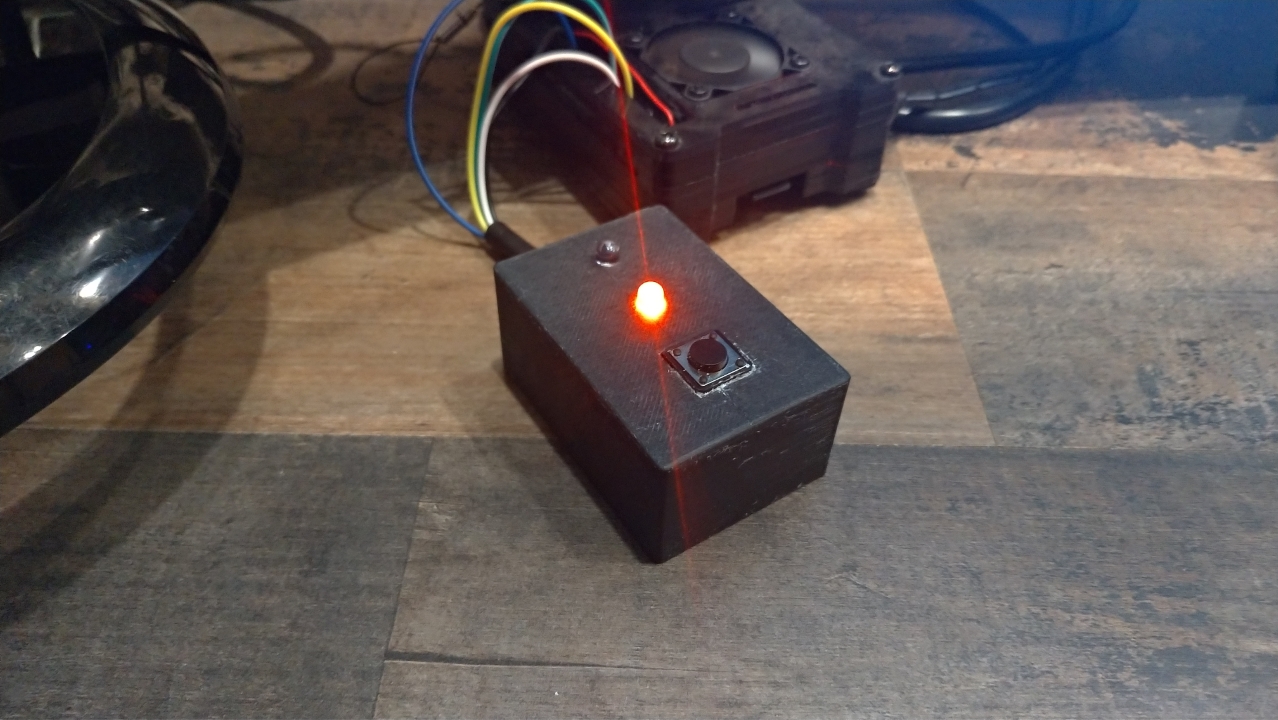
Using a Python script running on the Raspberry Pi, the set up uses a push button to switch between a red and a blue LED(I didn’t have a green one).
When the LEDs are switched the time is recorded in an excel spreadsheet.
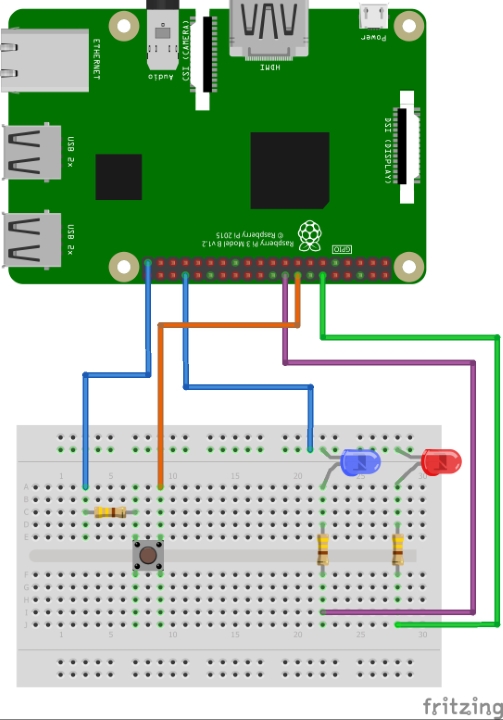
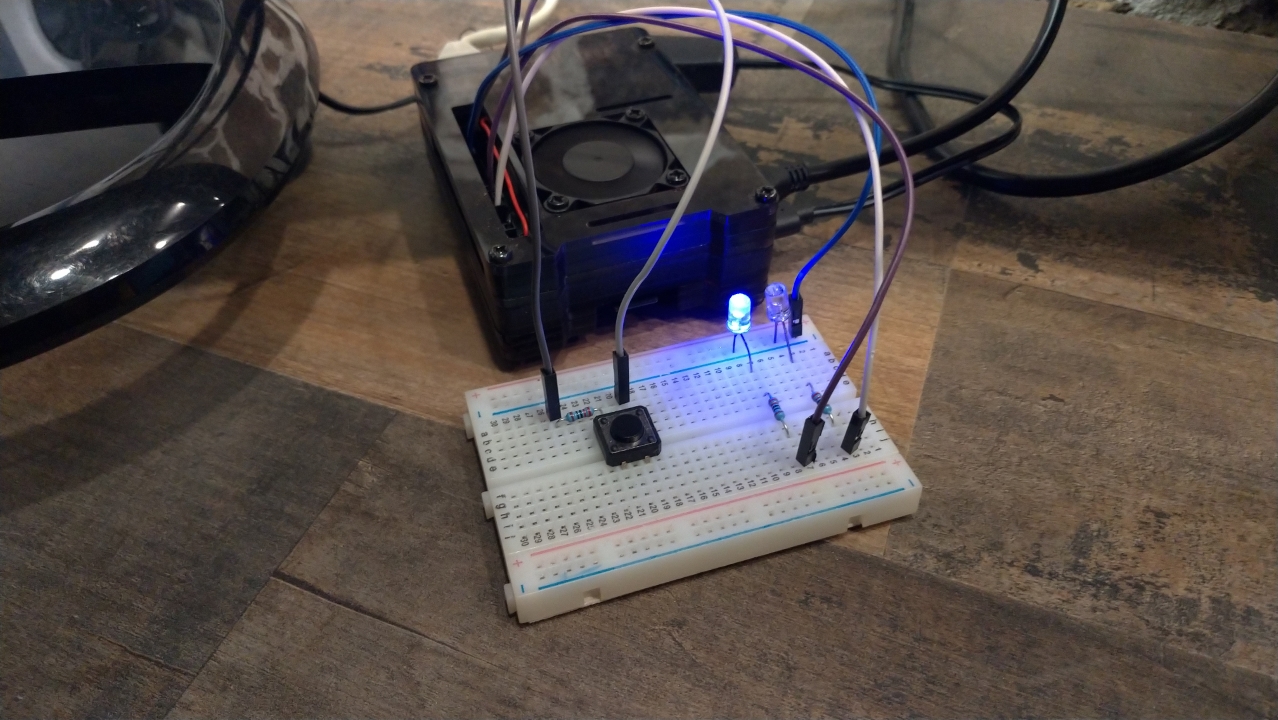
The Test Set-Up
I started by building a prototype of the time recorder on a half-size breadboard. Once I was happy with the way it works the plan was to put together a boxed version using a 3d printed case and soldered connections.
The components are connected using Dupont wires as shown by the fritzing diagram below
The Code
I wrote a short python script that would detect the button push and switch the LED states. On switching, the time is recorded in an excel workbook.
I’ve used the openpyxl library to interact with the workbook(which I created manually in the home folder on the Raspberry Pi).
The script enters a start time, end time, and a total for the work period.
#Libraries
import RPi.GPIO as GPIO
from time import sleep
import datetime
from openpyxl import *

wb = load_workbook('hours.xlsx')
ws=wb["Sheet1"]
wcell=ws.cell(1,1)

#Set warnings off (optional)
GPIO.setwarnings(False)
GPIO.setmode(GPIO.BCM)
#Set Button and LED pins
Button = 23
LED = 24
LED2 = 18

row = ws.max_row +1

#Setup Button and LED
GPIO.setup(Button,GPIO.IN,pull_up_down=GPIO.PUD_UP)

GPIO.setup(LED,GPIO.OUT)
GPIO.setup(LED2,GPIO.OUT)

GPIO.output(LED,GPIO.LOW)
GPIO.output(LED2,GPIO.HIGH)


def action1(Button):
    state = GPIO.input(LED)
    now = datetime.datetime.now()
    global start
    global row
    if state:
        GPIO.output(LED,GPIO.LOW)
        GPIO.output(LED2,GPIO.HIGH)

        end = datetime.datetime.now()
        total = (end - start)
        wcell1=ws.cell(row,1)
        wcell1.value = now.strftime('%Y-%m-%d')

        wcell2=ws.cell(row,2)
        wcell2.value = now.strftime('%H:%M')

        wcell3=ws.cell(row,3)
        wcell3.value = ('OFF')

        wcell4=ws.cell(row,4)
        wcell4.value = total

        wb.save('hours.xlsx')

        row += 1
        print ("Clocked OFF")


    else:
        GPIO.output(LED,GPIO.HIGH)
        GPIO.output(LED2,GPIO.LOW)

        wcell1=ws.cell(row,1)
        wcell1.value = now.strftime('%Y-%m-%d')

        wcell2=ws.cell(row,2)
        wcell2.value = now.strftime('%H:%M')

        wcell3=ws.cell(row,3)
        wcell3.value = ('ON')

        start = datetime.datetime.now()

        wb.save('hours.xlsx')
        row += 1
        print ("Clocked ON")

GPIO.add_event_detect(Button, GPIO.BOTH, callback=action1,bouncetime=800)


print("Time Recording Started")
try:
    while True:

        xx = 0

except KeyboardInterrupt:
    GPIO.cleanup()

print ("Time Recording Stopped")
print ("Cleaned Up GPIO's")
Setting Up and Running
Create a script in the home directory using your preferred editor(I used Thonney Python IDE) and save as clockin.py
Install LibreOffice on the Pi, if it’s not installed already, and create a blank workbook named hours.xlsx
Run the script from the terminal using the following command
python3 clockin.pyThe red LED should light up to show that it’s running.
When the button is pressed the blue LED lights up, the red one goes out, and the time is recorded in the spreadsheet.
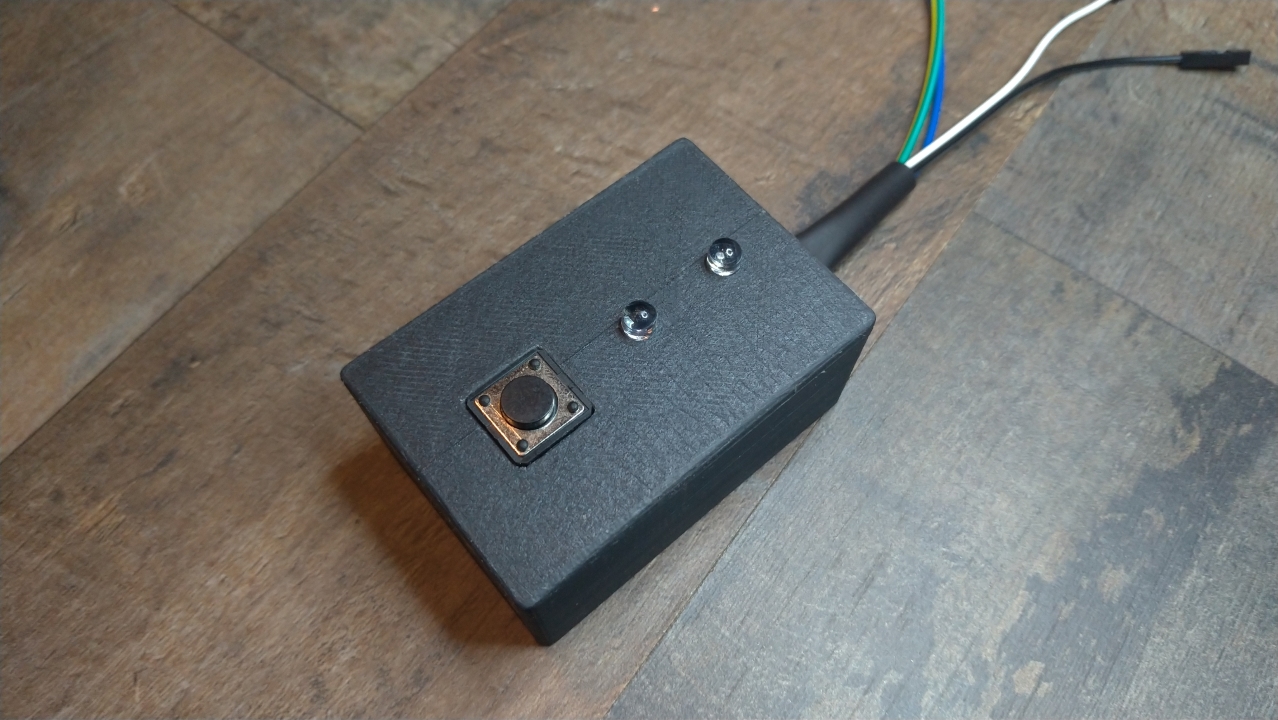
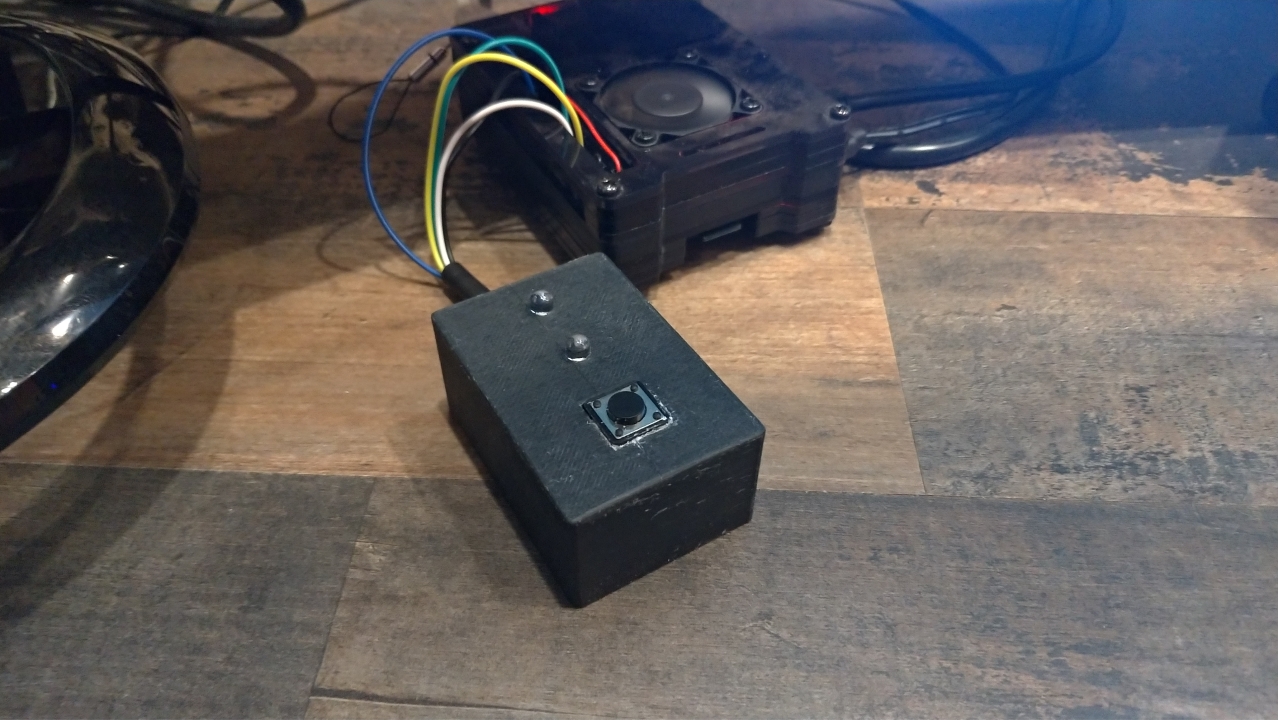
Boxing it up
The Raspberry time recording device is working how I want, so it’s time to make it look more professional.
Using SketchUp to model a simple box to hold the button and two LEDs, with a hole for the wires to enter.
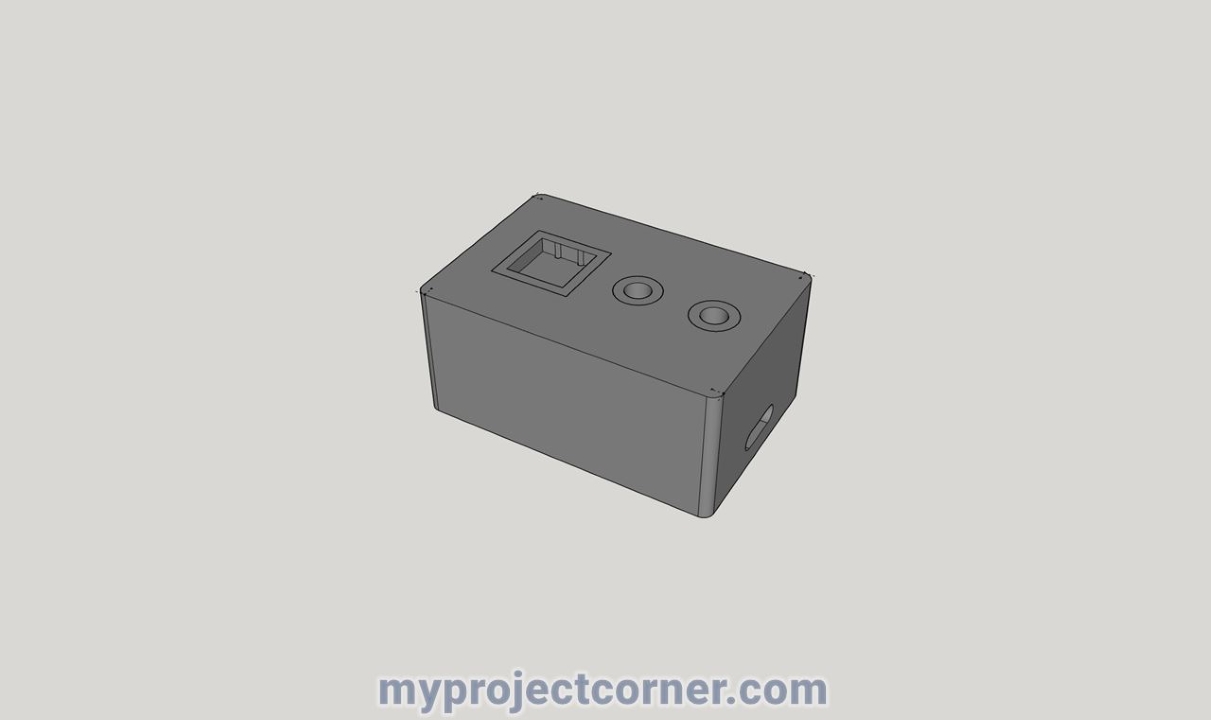
The design and print files can be found on Thingiverse
I printed the box in black PLA+, as it blends in well with my desktop. The STL file was sliced using CURA software. The design needs to be printed with support.
There is a small amount post-printing clean up needed, especially around the button recess area
Soldering The Connections
Again using Dupont wires, solder permanently the components in the box.

Soldering the button terminals is a bit fiddly, make sure the connections are well tinned before attaching
Sealing with Wax
Adding a piece of heat-shrink at the exit of the box to pull the wires together and finishing off the unit by filling it with candle wax.
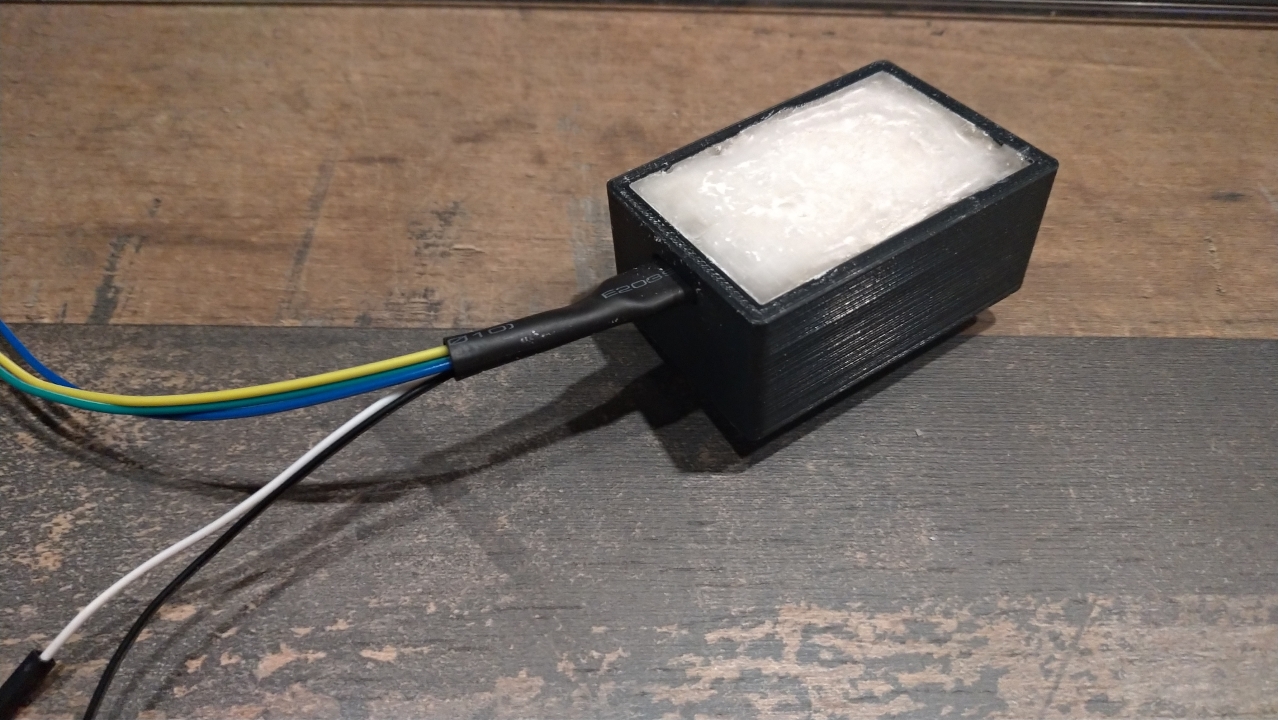
The addition of the candle wax protects and holds the connections in place, at the same time adding weight to help stop it moving around during use

At The End Of The Day
When I’ve finished for the day, I go back to the terminal and do a ‘ctrl + c’ to stop and clean up the Raspberry Pis GPIOs. I could leave it running, as the Raspberry Pi is always on, but I prefer to stop it.
At the end of the week, I copy the worksheet into another workbook to format and add up my hours worked.
The openpyxl library has a lot of options for formatting and working with the data. However, I wanted to keep it as simple as possible
This set-up is great for keeping track of ‘work from home’ hours, much better than manually entering times