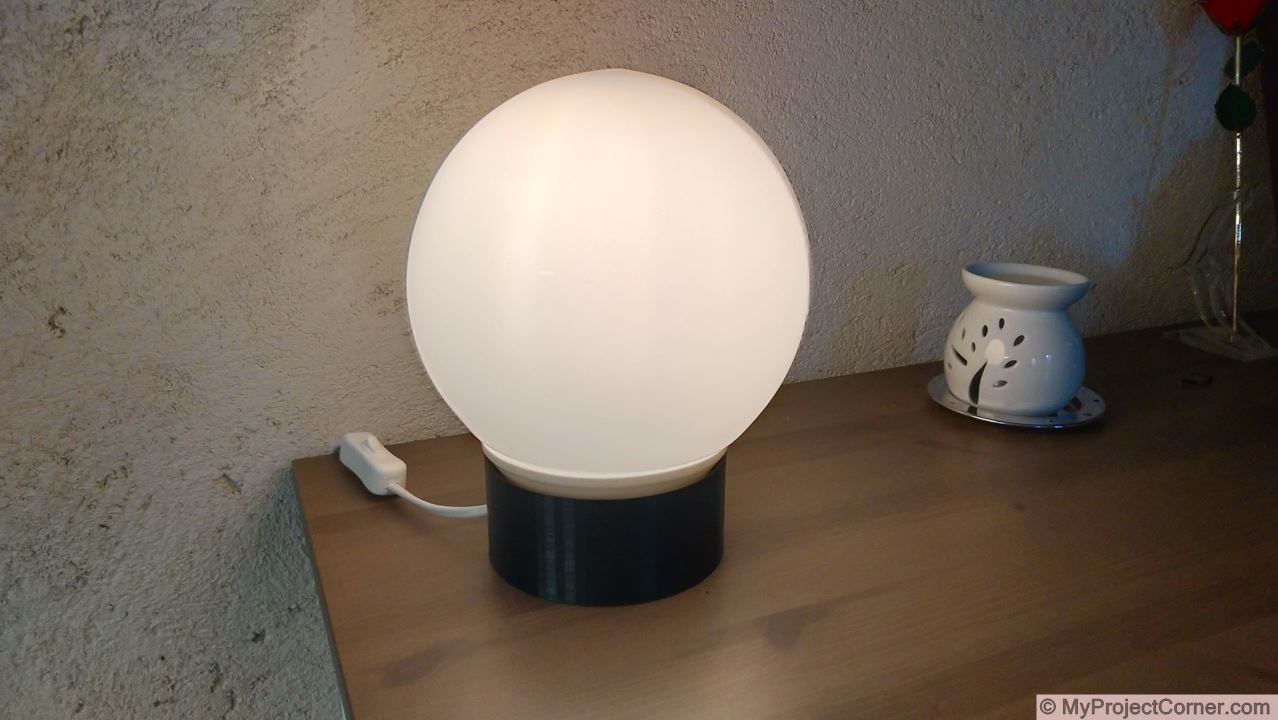
Finished Sunrise Alarm Lamp
This is my sunrise lamp build, I wanted to find out if a sunrise lamp could really make it easier to get up on dark winter mornings. Not wanting to spend the 60+ euros on a ready made lamp (and because I like to make stuff), I came up with this design.
The idea is that the light stimulates you into waking up, exactly as you would on a summer’s morning, feeling relaxed and fresh, without the need for an alarm.
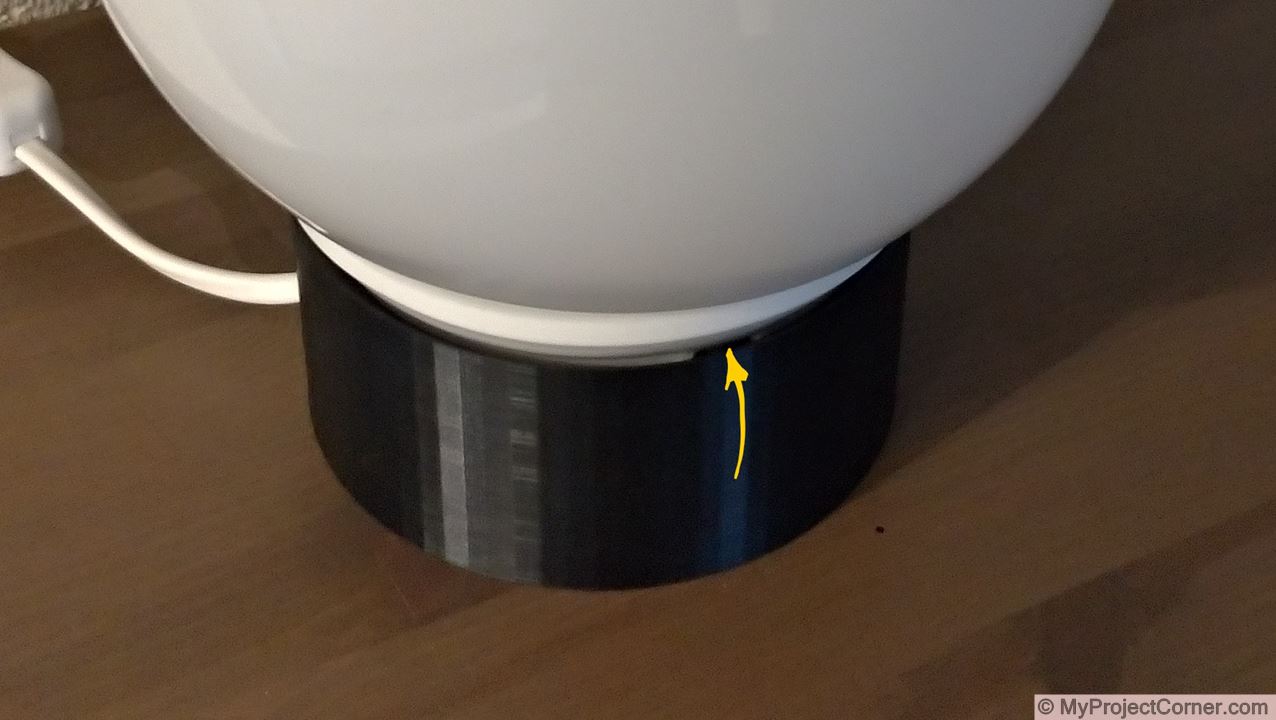
It is built around an Ikea Fado table lamp and dimmable led bulb, using a 3d printed base to house the electronics. The final unit will be controlled through my Raspberry Pi Node Red dashboard.
Parts Required for the Sunrise Lamp
- Fado Lamp - Ikea
- Dimmable LED Bulb - Ikea
- WeMos D1 mini
- Hi-Link 220v AC - 5v DC
- RobotDyn PWM Dimmer
- Dupont Connectors
- The 3D Printed Base
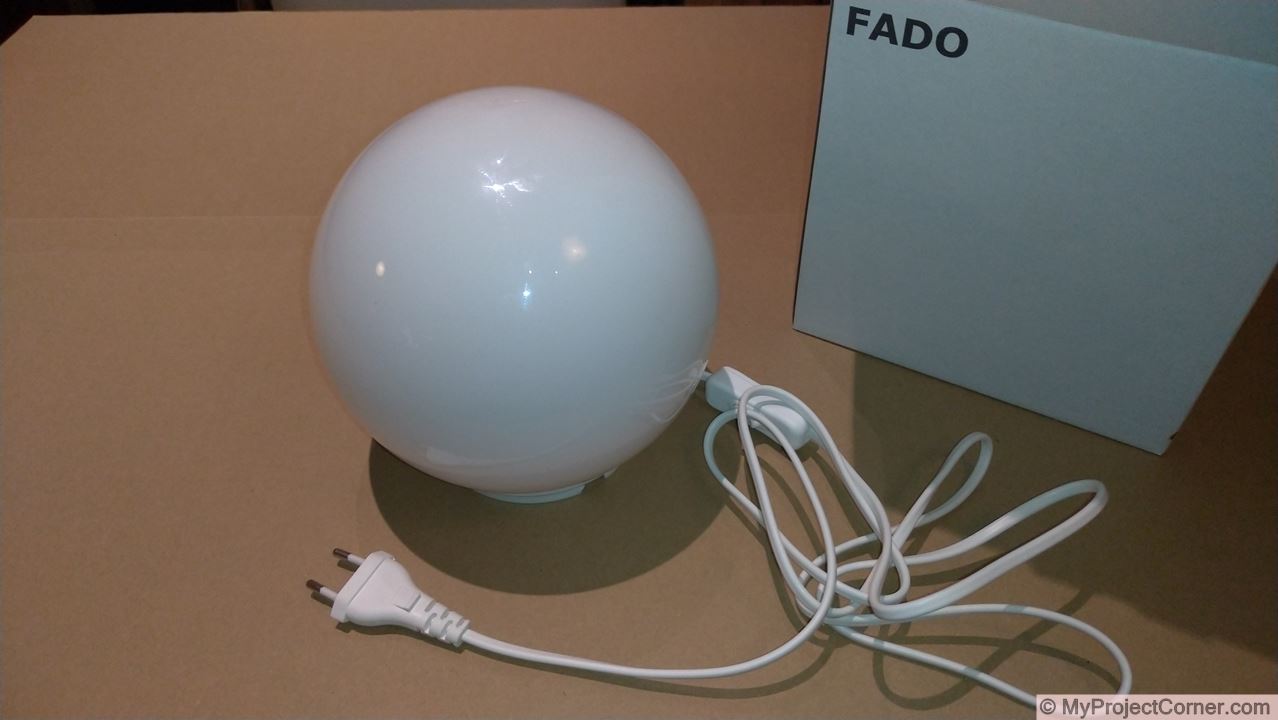
Fado Lamp From Ikea
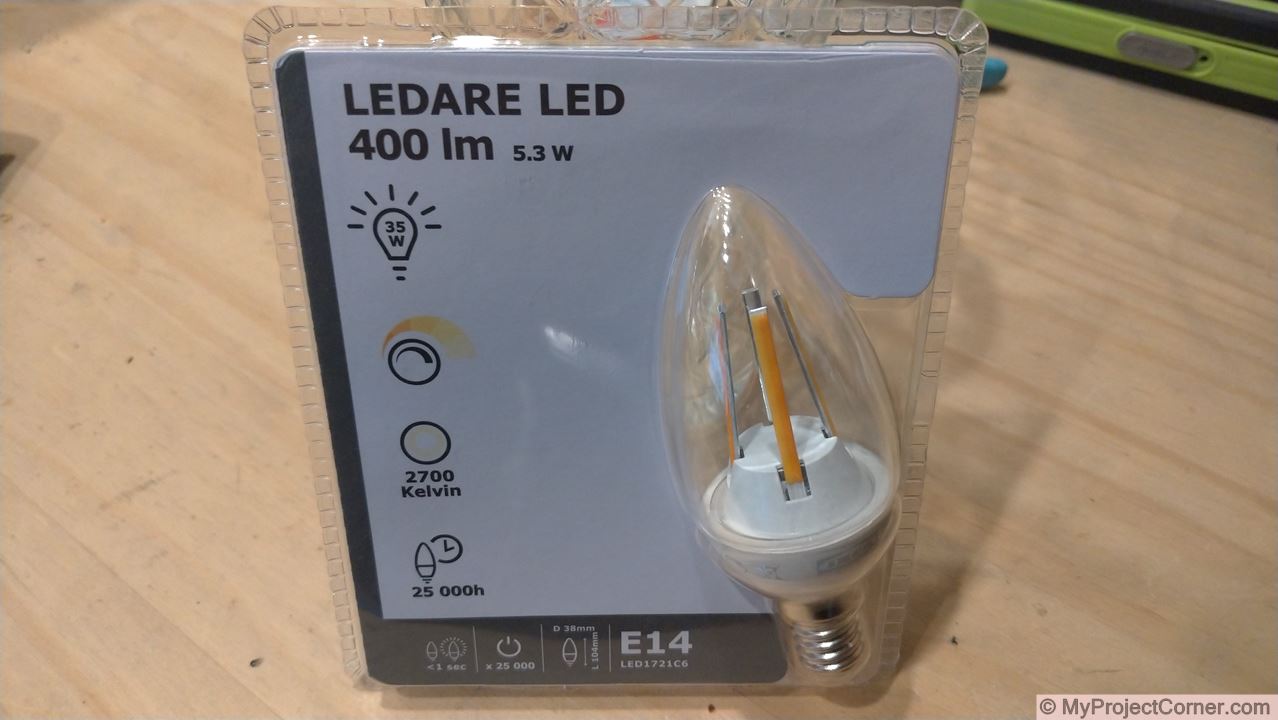
LED Bulb From Ikea

WeMos D1 mini
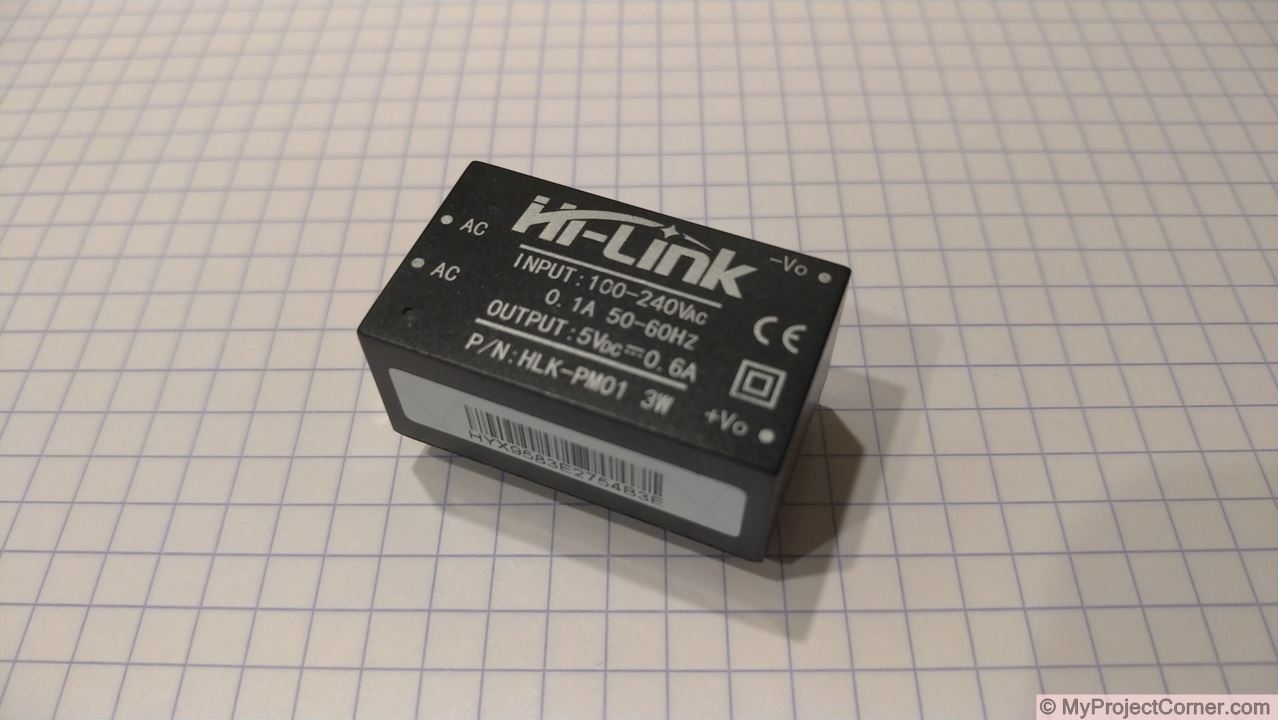
Hi-Link 220v AC - 5v DC
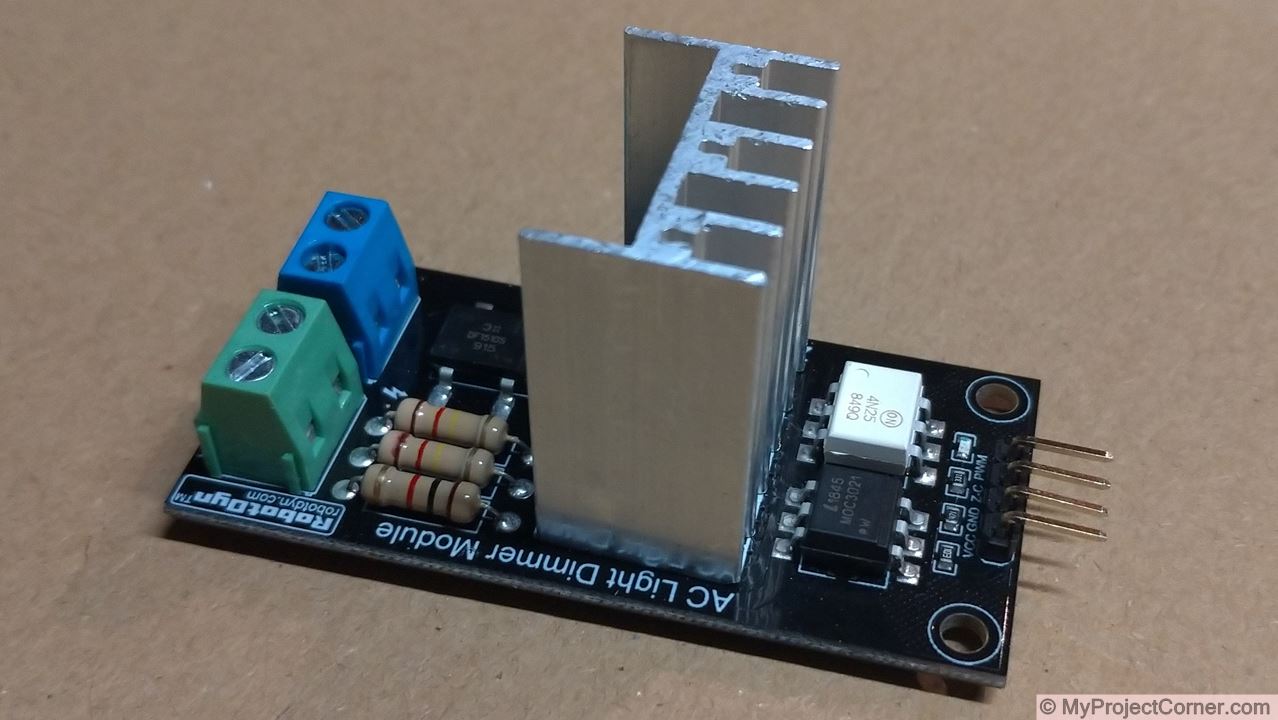
RobotDyn PWM Dimmer
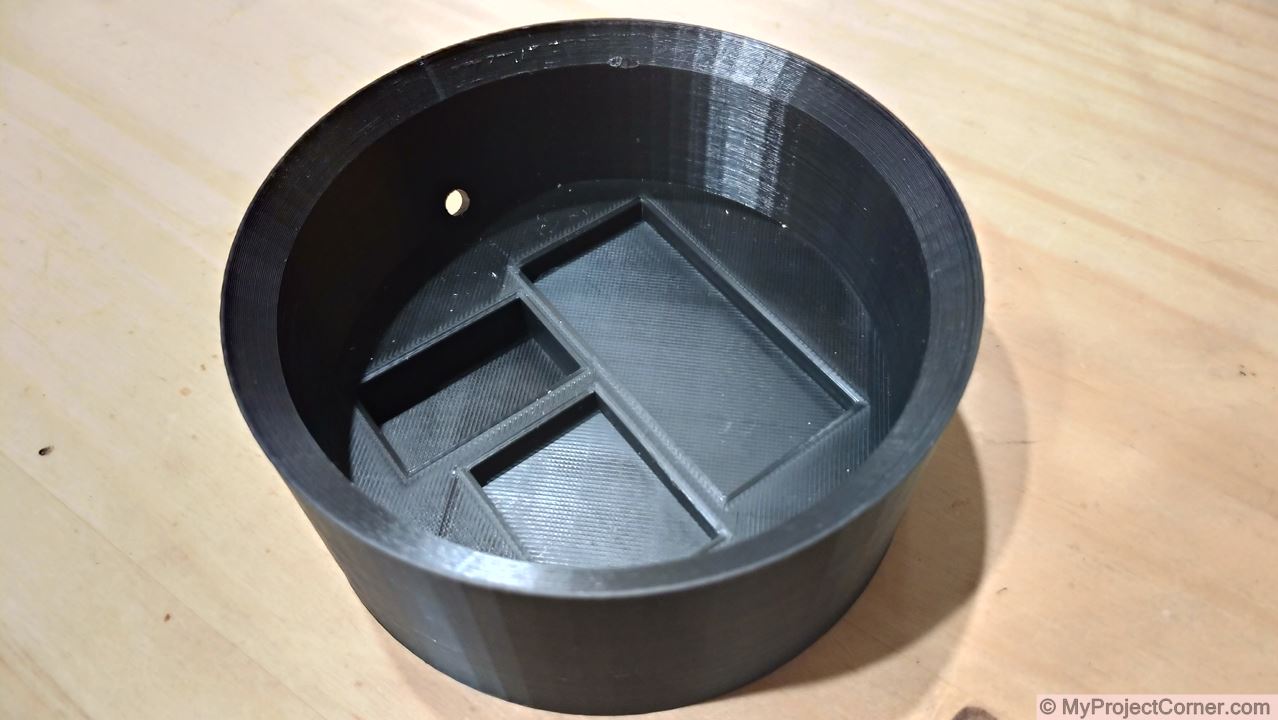
3D Printed Base
Excluding the 3d print the total cost came in at under 25€
Design and Printing
3d Printed Base for Sunrise Lamp
I started by using SketchUp to design a base that would hold the electronics to control the lamp.
The design can be downloaded from Thingiverse
I printed with 20% infill and 3 layers for base and walls. This makes it a nice solid print. The print time is upwards of 12 hrs using the settings that I used.

The lamp doesn’t sit fully in the printed base because of the taper on the base of the lamp. This was not intended but it’s not extremely visible and the 4 small gaps allow for heat dispersal (not that it gets very hot at all).
Preparation and build
Adding the Electronics to the Sunrise Lamp Base
Cut down the dimmer heatsink
It is necessary to reduce the height of the heatsink on the RobotDyn PWM dimmer to clear the base of the lamp.
Using a metal saw I removed 10mm from the top of the heatsink
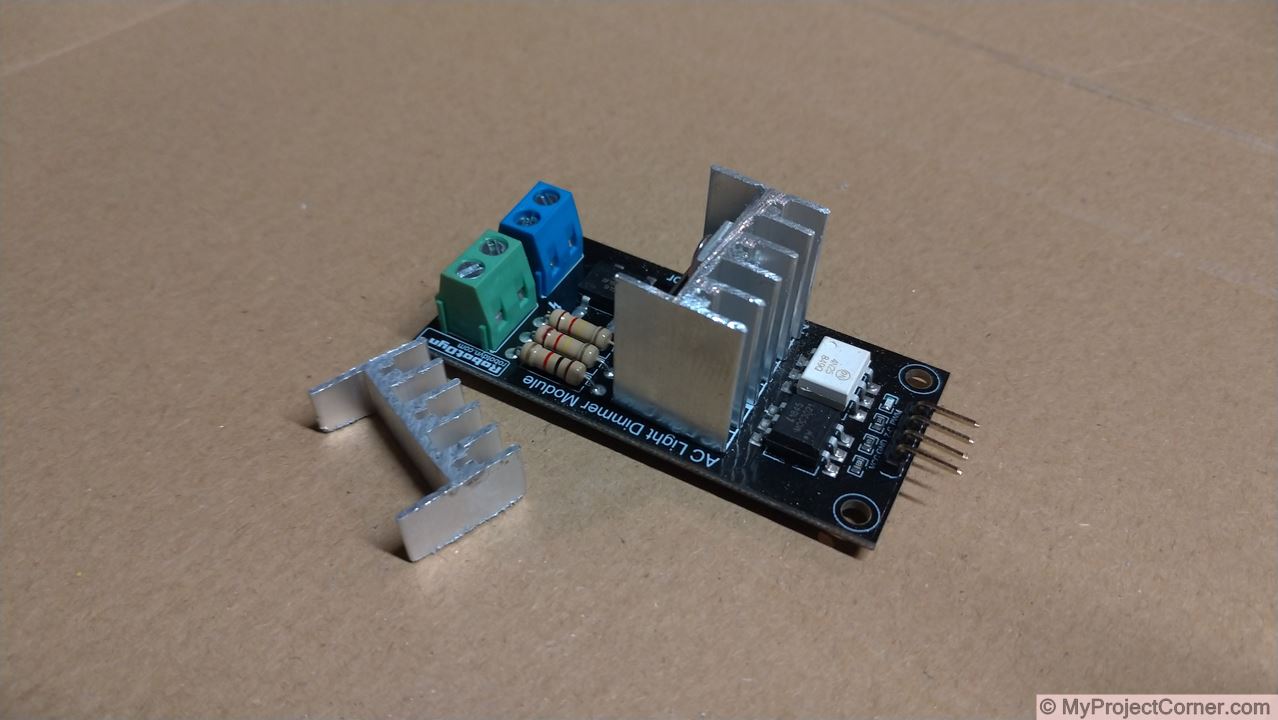
I wouldn’t usually recommend reducing the size of a heatsink, but as the lamp will only be in operation for 45 minutes per day the heat build up should be minimal.
Soldering the WeMos D1 Mini Pins
I used 2 blocks of pins, a 2 & a 4 as shown.
- Pins: 5v & G
- Pins: D6, D7, D8 & 3.3v
Insert and connect components
The electronics are held in place with a dab of hot glue
I’ve shortened standard length Dupont connection wires, I really need to invest in a crimping kit as it would save me a lot of time and produce a better finished look.
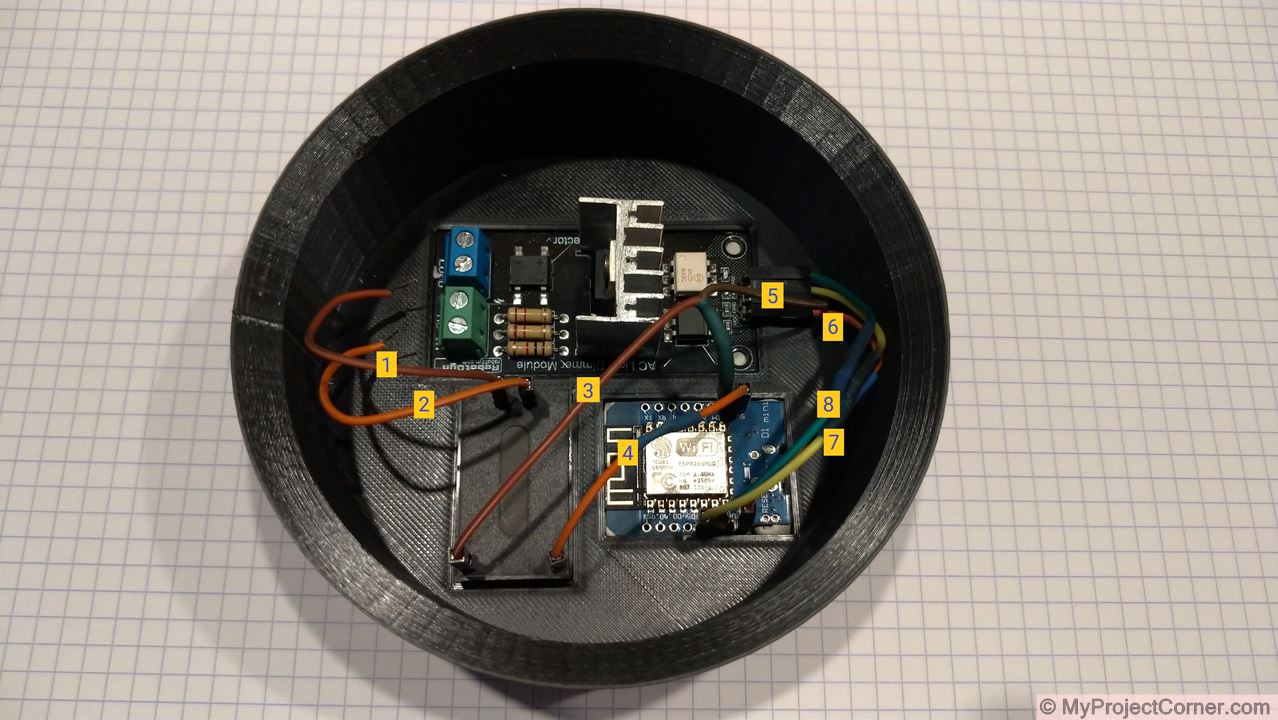
Wiring Connections
- Hi-Link AC supply.
- Hi-Link AC supply.
- DC Negative connection spliced to WeMos Ground pin.
- DC Positive connected to WeMos 5v pin.
- Dimmer Ground pin spliced to WeMos G pin.
- Dimmer VCC pin connected to WeMos 3.3v
- Dimmer Z-C pin connected to WeMos D6 pin.
- Dimmer PWM pin connected to WeMos D7 pin.
Cutting the lamp power cable to leave approx. 100mm on the bulb side. Tin the ends with a small amount of solder & also solder the Hi-Link AC supply wires to the power supply wires. Secure in the dimmer connection blocks as shown.
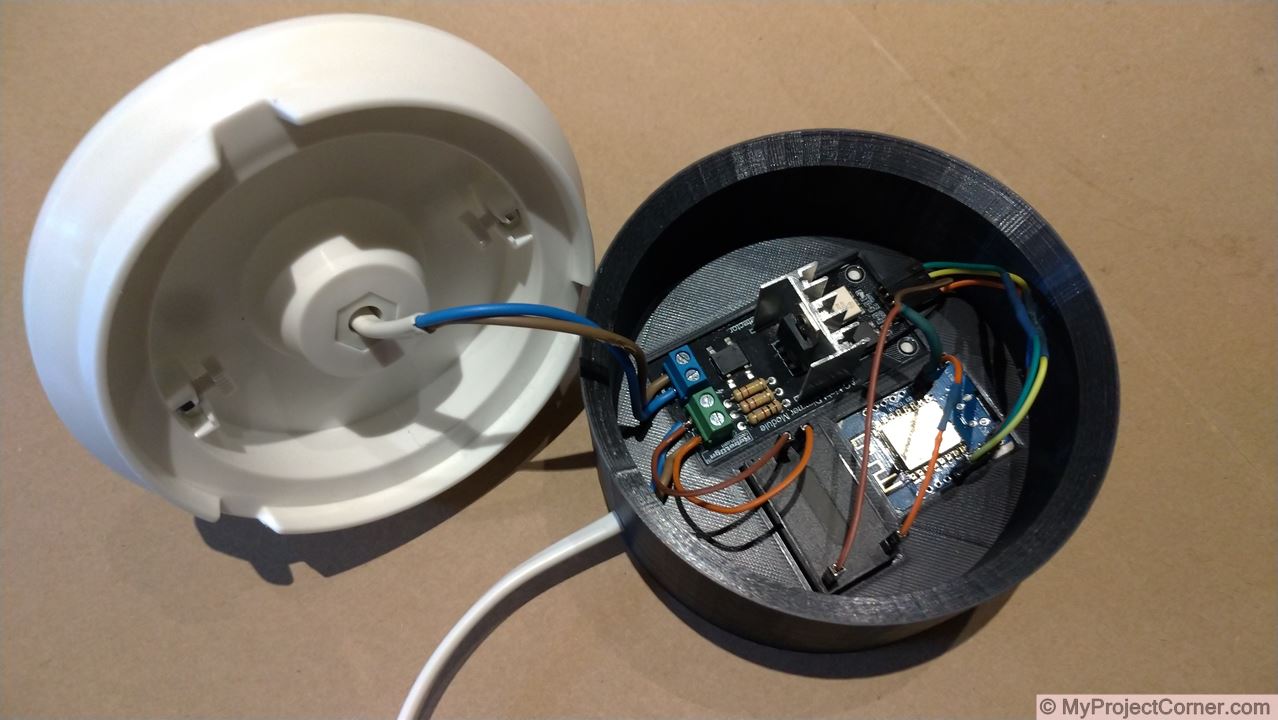
Finished Sunrise Alarm Lamp wiring
Setting Up
Programming the WeMos D1 Mini
I already use Node Red & MQTT running on my Raspberry Pi to control various devices around the house, so I wanted to integrate the diy sunrise lamp into the same system.
The main part of the code that controls the dimmer board came Nassir Malik’s GitHub page HERE. I would like to thank him for his work, really helped me out.
I added Wi-Fi and MQTT support and included a routine that would increase the brightness of the diy sunrise lamp over a 30 minute period.
#include "hw_timer.h"
#include <ESP8266WiFi.h>
#include <PubSubClient.h>
// Change the credentials below, so your ESP8266 connects to your router
const char* ssid = "Your SSID";
const char* password = "Your Password";
// Change the variable to your Raspberry Pi IP address, so it connects to your MQTT broker
const char* mqtt_server = "MQTT Server IP Address";
// Initializes the espClient. You should change the espClient name if you have multiple ESPs running in your home automation system
WiFiClient sunrise;
PubSubClient client(sunrise);

const byte zcPin = 12;
const byte pwmPin = 13;

byte fade = 1;
byte state = 1;
byte tarBrightness = 5;
byte curBrightness = 0;
byte zcState = 0; // 0 = ready; 1 = processing;

void ICACHE_RAM_ATTR zcDetectISR ();
void ICACHE_RAM_ATTR dimTimerISR ();
int val = 1;
int tim = 1;
String lampState = "off";

void setup_wifi() {
  delay(10);
  Serial.println();
  Serial.print("Connecting to ");
  Serial.println(ssid);
  WiFi.begin(ssid, password);
  while (WiFi.status() != WL_CONNECTED) {
    delay(500);
    Serial.print(".");
  }
  Serial.println("");
  Serial.print("WiFi connected - ESP IP address: ");
  Serial.println(WiFi.localIP());
}
void callback(String topic, byte* message, unsigned int length) {
  Serial.print("Message arrived on topic: ");
  Serial.print(topic);
  Serial.print(". Message: ");
  String messageTemp;

  for (int i = 0; i < length; i++) {
    Serial.print((char)message[i]);
    messageTemp += (char)message[i];
  }
  Serial.println();
  if (topic == "sunriseLamp/state") {
    Serial.print("Turning on Outside light ");
    if (messageTemp == "on") {
      lampState = "on";
      Serial.print("On");
    }
    else if (messageTemp == "off") {
      lampState = "off";
      Serial.print("Off");
    }
  }
  Serial.println();
}
// This functions reconnects your ESP8266 to your MQTT broker
// Change the function below if you want to subscribe to more topics with your ESP8266
void reconnect() {
  // Loop until we're reconnected
  while (!client.connected()) {
    Serial.print("Attempting MQTT connection...");
    // Attempt to connect
    if (client.connect("D1Mini_sunriseLamp")) {
      Serial.println("connected");
      // Subscribe or resubscribe to a topic
      // You can subscribe to more topics (to control more LEDs in this example)
      client.subscribe("sunriseLamp/state");
    } else {
      Serial.print("failed, rc=");
      Serial.print(client.state());
      Serial.println(" try again in 5 seconds");
      // Wait 5 seconds before retrying
      delay(5000);
    }
  }
}
void setup() {
  Serial.begin(115200);
  setup_wifi();
  client.setServer(mqtt_server, 1883);
  client.setCallback(callback);
  pinMode(zcPin, INPUT_PULLUP);
  pinMode(pwmPin, OUTPUT);
  attachInterrupt(zcPin, zcDetectISR, RISING);    // Attach an Interupt to Pin 2 (interupt 0) for Zero Cross Detection
  hw_timer_init(NMI_SOURCE, 0);
  hw_timer_set_func(dimTimerISR);
}
void mqttCheck() {
  if (!client.connected()) {
    reconnect();
  }
  if (!client.loop())
    client.connect("D1Mini_sunriseLamp");
}
void loop() {
  if (WiFi.status() != WL_CONNECTED) {
    delay(1);
    setup_wifi();
    return;
  }
  mqttCheck();
  if (lampState == "off") state = 0;
  if (lampState == "on") {
    val = 1;
    state = 1;
    for (val <= 250; val++;) {
      tarBrightness = val;
      mqttCheck();
      if (lampState == "off") {
        state = 0;
        Serial.println(lampState);
        break;
      }
      delay(7200);
    }
  }
}
void dimTimerISR() {
  if (fade == 1) {
    if (curBrightness > tarBrightness || (state == 0 && curBrightness > 0)) {
      --curBrightness;
    }
    else if (curBrightness < tarBrightness && state == 1 && curBrightness < 255) {
      ++curBrightness;
    }
  }
  else {
    if (state == 1) {
      curBrightness = tarBrightness;
    }
    else {
      curBrightness = 0;
    }
  }
  if (curBrightness == 0) {
    state = 0;
    digitalWrite(pwmPin, 0);
  }
  else if (curBrightness == 255) {
    state = 1;
    digitalWrite(pwmPin, 1);
  }
  else {
    digitalWrite(pwmPin, 1);
  }
  zcState = 0;
}
void zcDetectISR() {
  if (zcState == 0) {
    zcState = 1;

    if (curBrightness < 255 && curBrightness > 0) {
      digitalWrite(pwmPin, 0);

      int dimDelay = 30 * (255 - curBrightness) + 400;//400
      hw_timer_arm(dimDelay);
    }
  }
}
Node Red Set Up For Sunrise Lamp
I’m using 3 nodes in the flow.
- Big Timer Node – for more information refer to Scargill’s Big-Timer
- Switch Node – used for a manual override.
- Mqtt Output Node

Screenshot of Node Red flow
I have been using the DIY Sunrise Lamp for a few days and although the light doesn’t wake me up every time, it is nice to not be in total darkness when my google home mini starts playing music.