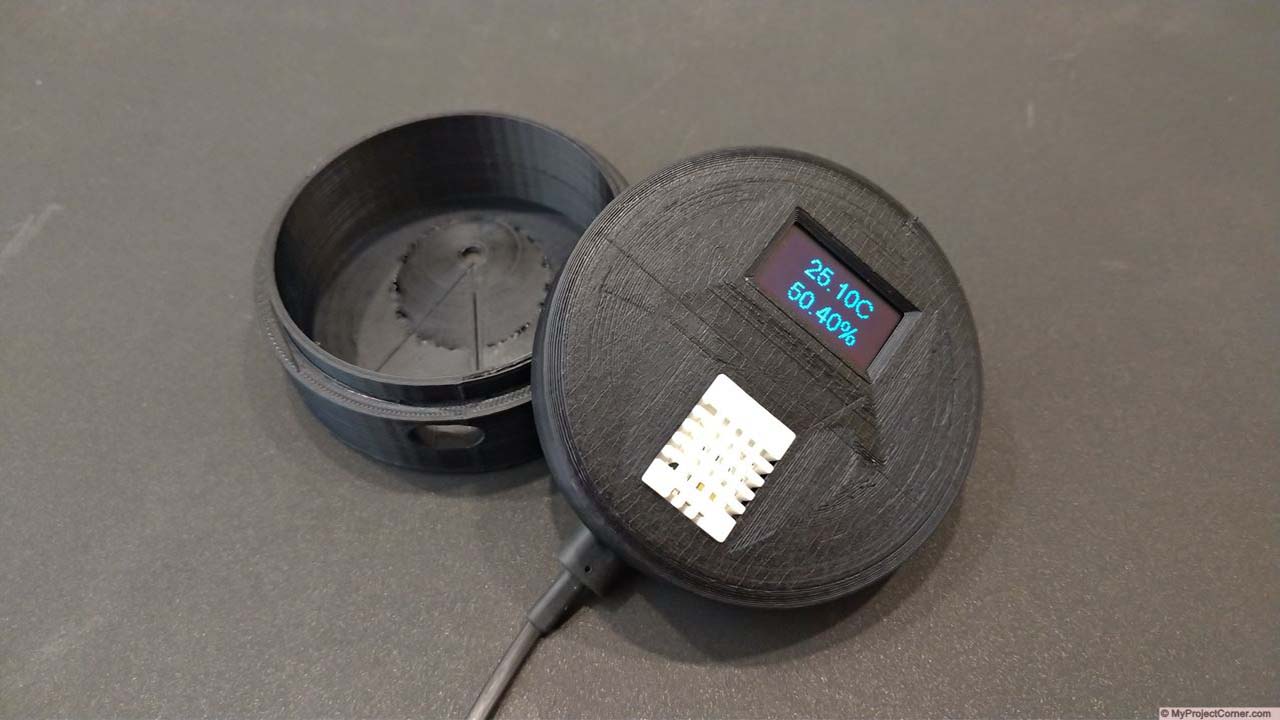
Connected Temperature & Humidity Sensor

An MQTT connected sensor with LCD readout to monitor temperature and humidity readings in my house. I’ve built 3 of these and placed them in different rooms, the temperature and humidity readings are sent by MQTT to my Node Red dashboard on the Raspberry Pi.
Although it’s not really necessary to have a digital readout for a connected sensor, it is handy to be able to see the temperature without having to connect to the node red dashboard.
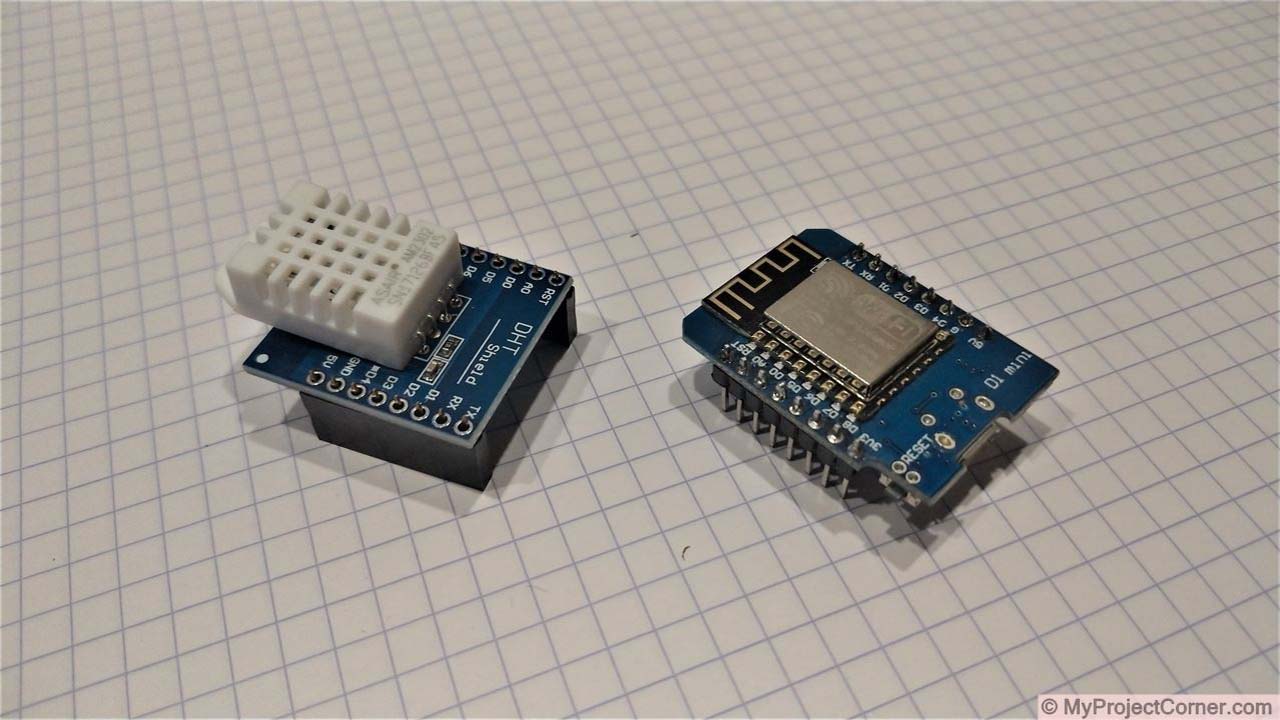
Parts used to build the sensor unit
- D1 mini
- DHT22 Shield
- Digital readout IC2 KY34-B
- Dupont connectors
- 3D printed case
- 5v power supply
Design and Printing
3D modeling the case
I used Tinkercad to create the 3D model for my design. This is the first time I’ve used Tinkercad and would highly recommend it. Very easy to use and produces a good model.
The stl and obj files are available for download on Thingiverse
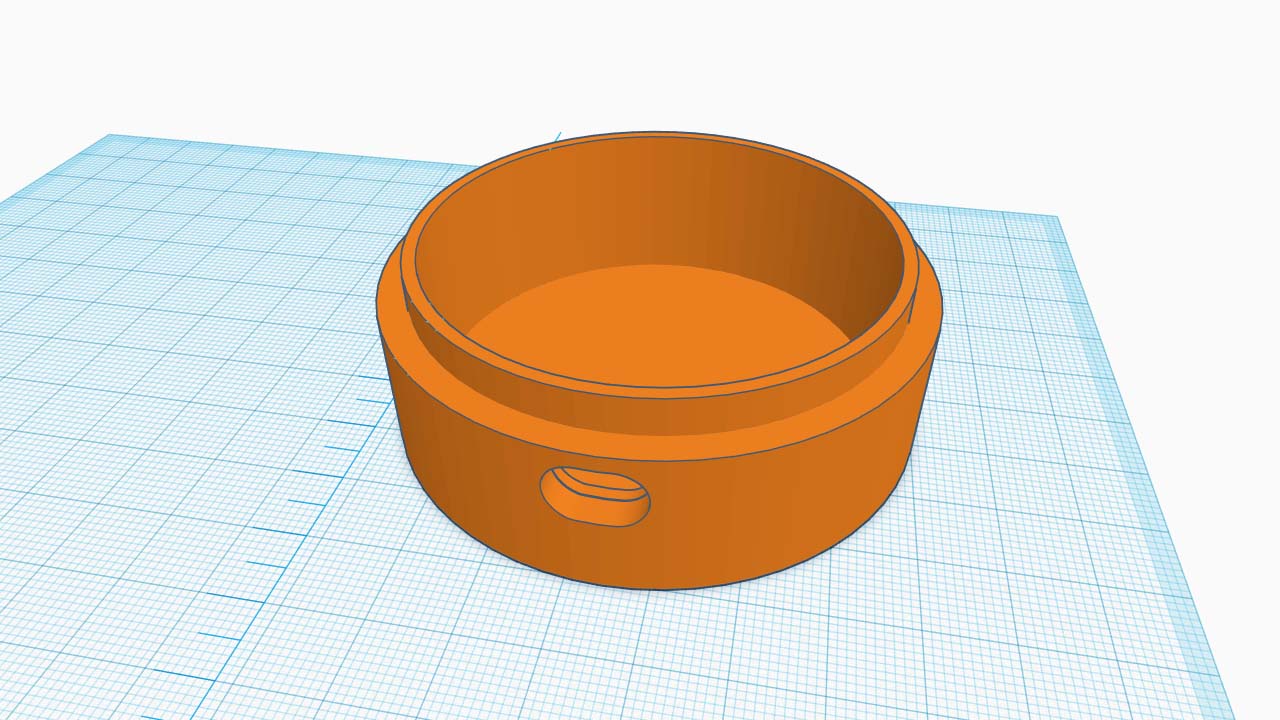
3d Printing the case
The design was printed in black PLA at a 0.2 resolution and 20% infill. The base was printed with support enabled for the oblong power supply hole.

Programming and connections
Upload the code to the D1 mini
Using the Arduino code below, change the wifi connection details to your own wifi network. Also set the IP address of the Raspberry Pi running the mqtt server.
You will also need the relevant board and support libraries
- ESP8266 support libraries
- Mqtt support
- IC2 Display
- DHT22
these can be easily installed via the ‘manage libraries’ option inside the Arduino IDE
When finished compile and upload to the D1 mini.
#include <ESP8266WiFi.h>
#include <PubSubClient.h>
#include <DHT.h>
#include "SSD1306.h" // alias for `#include "SSD1306Wire.h"`
#define DHTPIN D4     // what pin the DHT is connected to

// Initialize the OLED display using Wire library
SSD1306  display(0x3C, D3, D5); // (I2C Address, SCL Pin, SDA Pin)

#define DHTTYPE DHT22   // DHT 22  (AM2302)
const int TEMPERATURE_INTERVAL = 30;
unsigned long last_temperature_sent = 0;

// WiFi Connection Details
const char* ssid = "Your SSID";
const char* password = "Your password";

// Raspberry Pi IP address, so it connects to your MQTT broker
const char* mqtt_server = "IP address of mqtt server";

// Change these to suit
WiFiClient wemos_lounge;
PubSubClient client(wemos_lounge);

const int HUMIDITY_INTERVAL = 30;
unsigned long last_humidity_sent = 0;
String display_temp;
String display_humid;

DHT dht(DHTPIN, DHTTYPE);

// This functions connects your ESP8266 to your router
void setup_wifi() {
  delay(10);
  // We start by connecting to a WiFi network
  Serial.println();
  Serial.print("Connecting to ");
  Serial.println(ssid);
  WiFi.begin(ssid, password);
  while (WiFi.status() != WL_CONNECTED) {
    delay(500);
    Serial.print(".");
  }
  Serial.println("");
  Serial.print("WiFi connected - ESP IP address: ");
  Serial.println(WiFi.localIP());
}

// This functions reconnects your ESP8266 to your MQTT broker
void reconnect() {
  // Loop until we're reconnected
  while (!client.connected()) {
    Serial.print("Attempting MQTT connection...");
    if (client.connect("wemos_lounge")) {
      Serial.println("connected");
      // Subscribe or resubscribe to a topic
      client.subscribe("heating/temperature_lounge");
    } else {
      Serial.print("failed, rc=");
      Serial.print(client.state());
      Serial.println(" try again in 5 seconds");
      // Wait 5 seconds before retrying
      delay(5000);
    }
  }
}
void setupHandler() {
  // Do what you want to prepare your sensor
  display.clear();
}
void getSendTemperature() {
  if (millis() - last_temperature_sent >= TEMPERATURE_INTERVAL * 1000UL || last_temperature_sent == 0) {
    float temperature = dht.readTemperature(false);
    if (isnan(temperature)) {
      Serial.println("Failed to read from DHT sensor!");
      return;
    }
// May need to offset temperature reading:
// I found the reading to be 3.1° too high
    display_temp = (temperature-3.1);
    int temp = round(temperature-3.1);
    char cstr[16];
    itoa(temp, cstr, 10);
    client.publish("heating/temperature_lounge",cstr);
    Serial.print("Temperature: ");
    Serial.print(temperature);

    Serial.println(" °C");
  }
}
void getSendHumid() {
  if (millis() - last_humidity_sent >= HUMIDITY_INTERVAL * 1000UL || last_humidity_sent == 0) {
    float humidity = dht.readHumidity();

    if (isnan(humidity)) {
      Serial.println("Failed to read from DHT sensor!");
      return;
    }
    display_humid = humidity;
    int humid = round(humidity);
    char cstr[16];
    itoa(humid, cstr, 10);
    client.publish("heating/humidity_lounge", cstr);
    Serial.print("Humidity: ");
    Serial.print(humidity);
    Serial.println(" %");
  }
 }
void displayData() {
    display.clear();
    display.setTextAlignment(TEXT_ALIGN_CENTER);
    display.setFont(ArialMT_Plain_24);
    display.drawString(66, 5, display_temp + "C");
    display.drawString(66, 35, display_humid + "%");
    display.display();
}
void setup() {

  Serial.begin(115200);
  setup_wifi();
  client.setServer(mqtt_server, 1883);
  // Initialising the display.
  WiFi.mode(WIFI_STA);
  display.init();
  display.clear();
  display.flipScreenVertically();
  display.setTextAlignment(TEXT_ALIGN_CENTER);
  display.display();
}
void loop() {
  //connect wifi if not connected
  if (WiFi.status() != WL_CONNECTED) {
    delay(1);
    setup_wifi();
    return;
}
  if (!client.connected()) {
    reconnect();
  }
  if(!client.loop())
    client.connect("wemos_lounge");
  getSendTemperature();
  getSendHumid();
  displayData();
  delay(2000);
}
Assembling the components
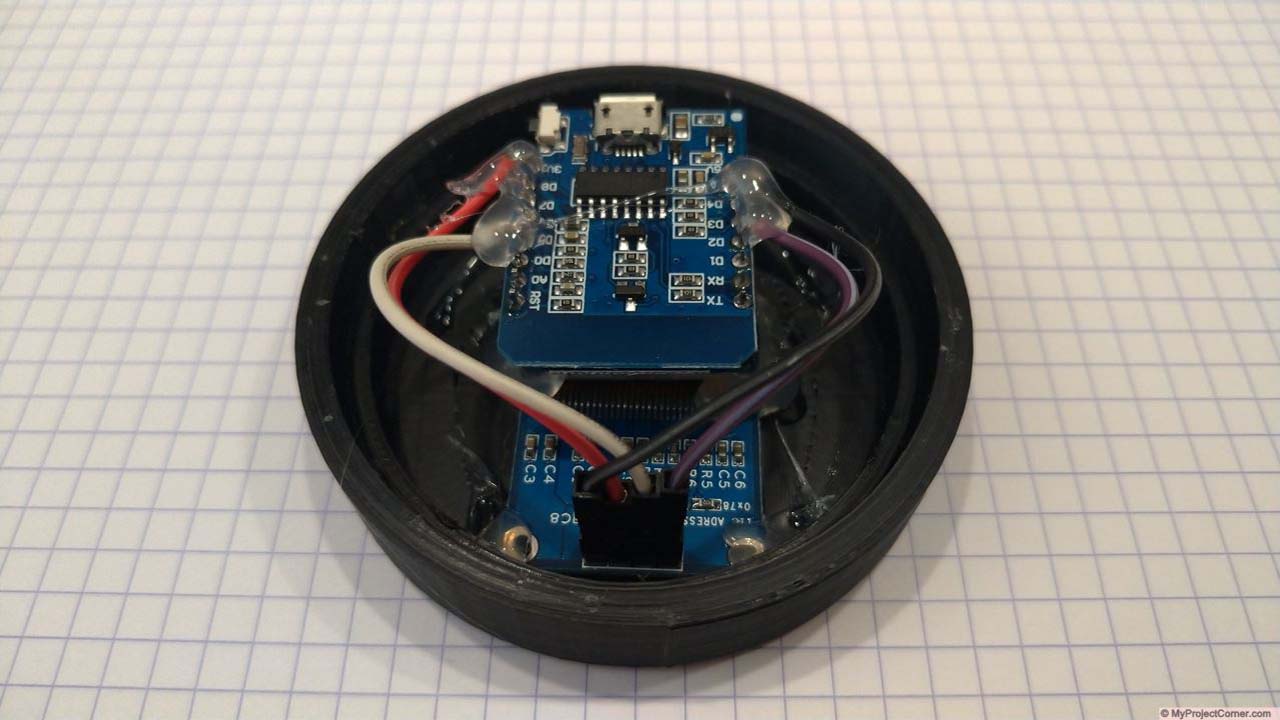
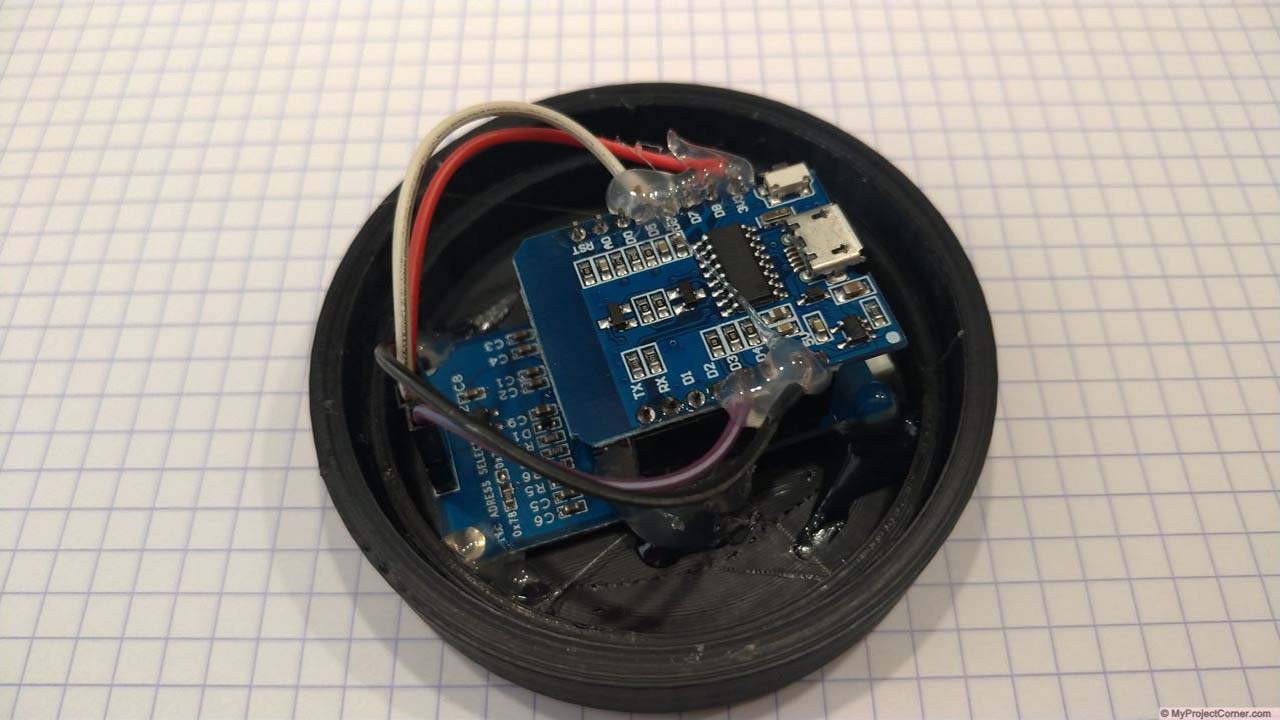
I purchased both the D1 mini and the DHT22 hat from AliExpress. A cheap source for these type of components (if your not in a big hurry, can take up to 3 weeks for delivery).
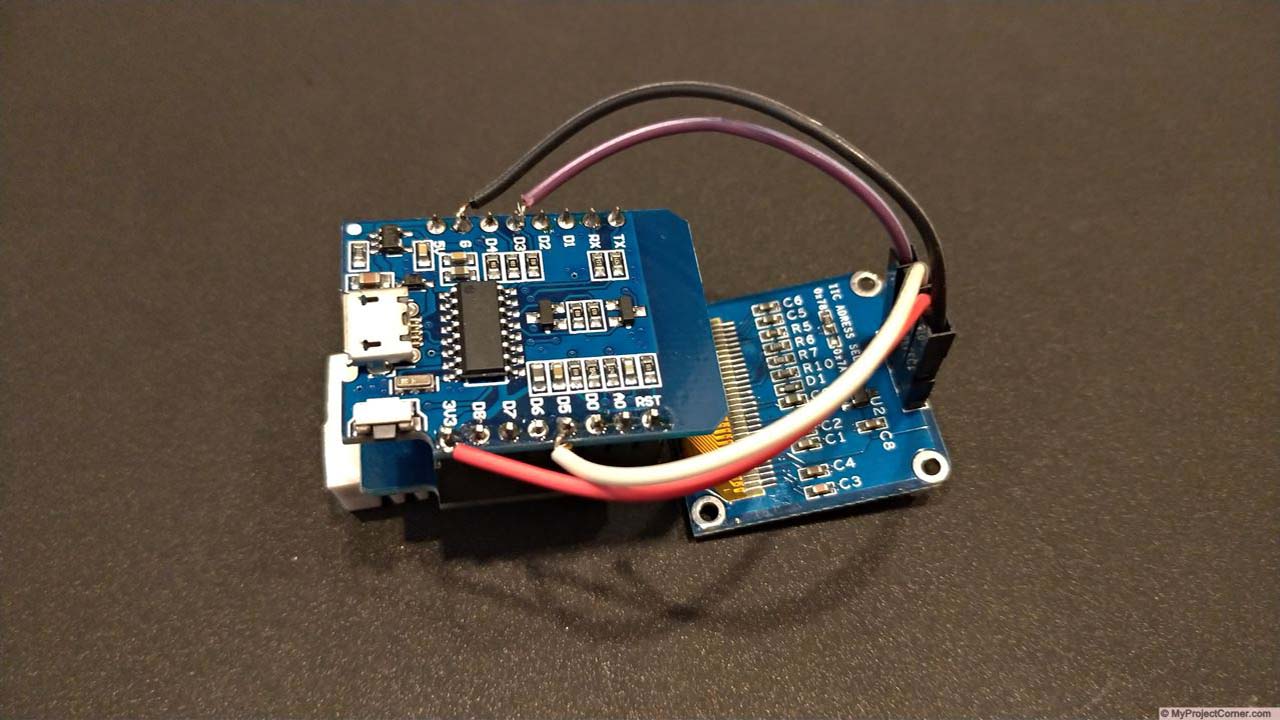
Connections from display to D1 mini
- Red wire VCC to 3.3v
- Black wire GND to G
- White wire SCL to D5
- Purple wire SDA to D3
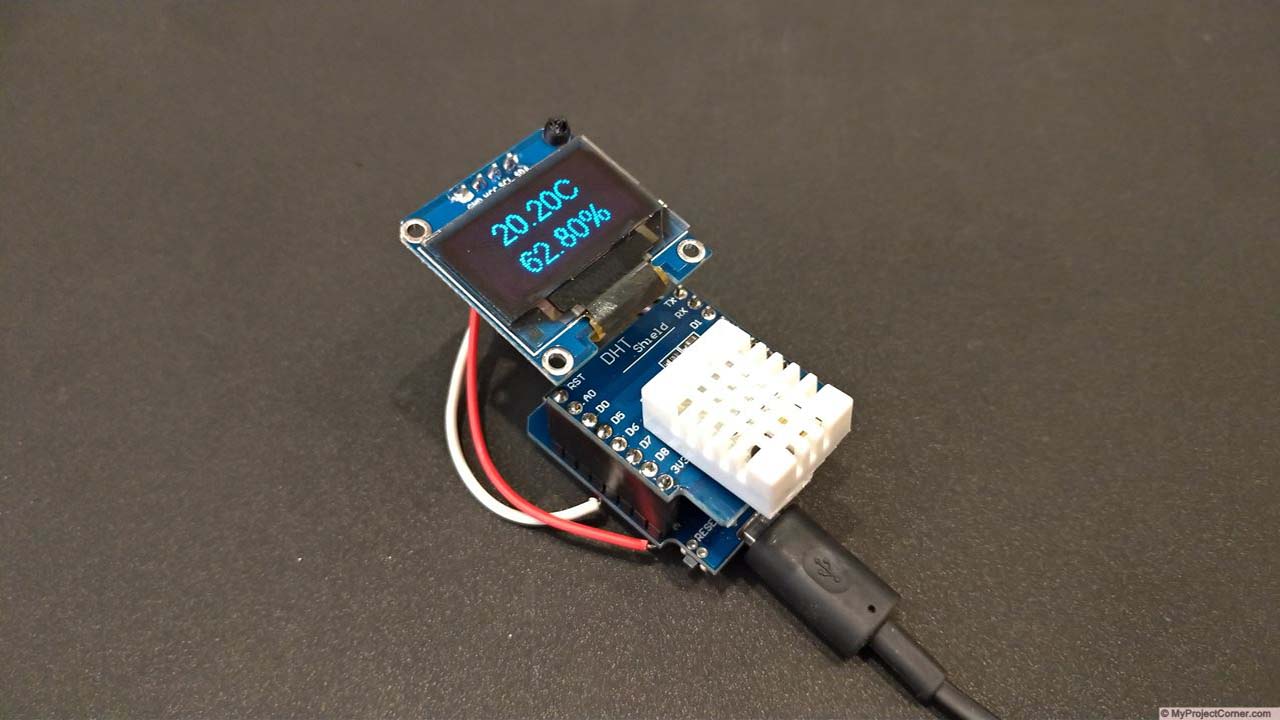
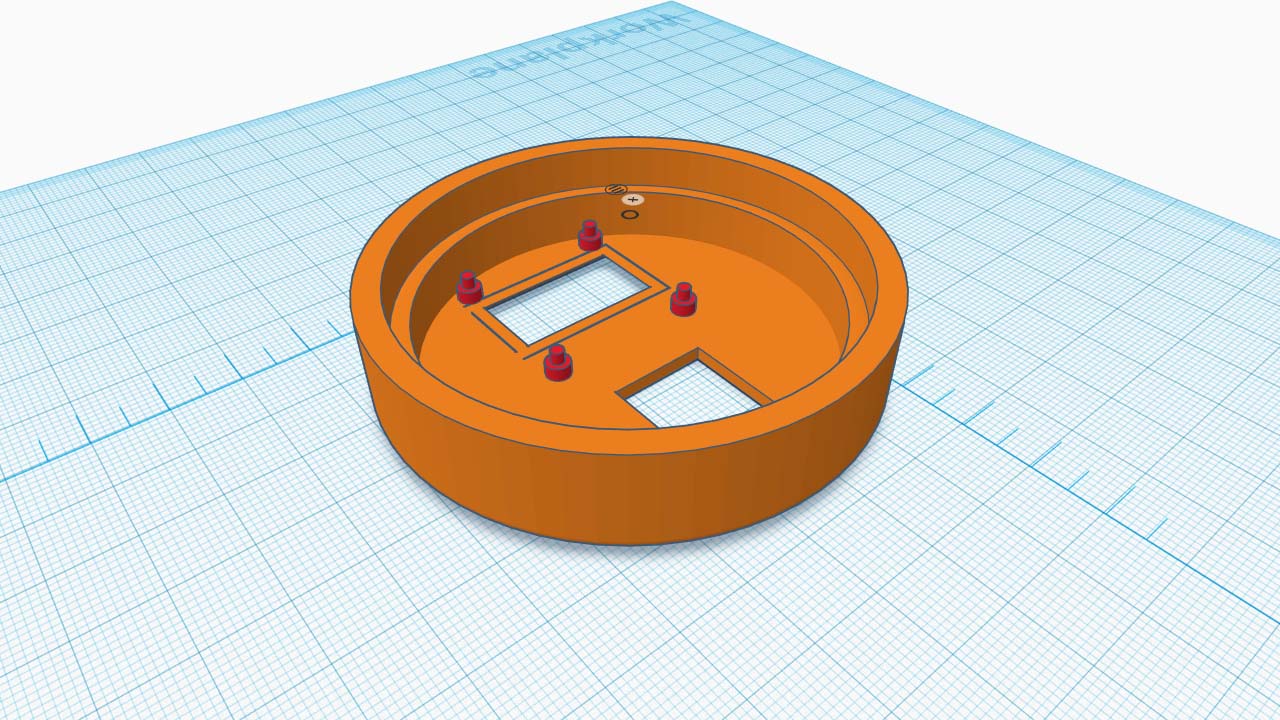
Assembling the components in the case
I have used my hot glue gun to assemble the connected temperature & humidity sensor.
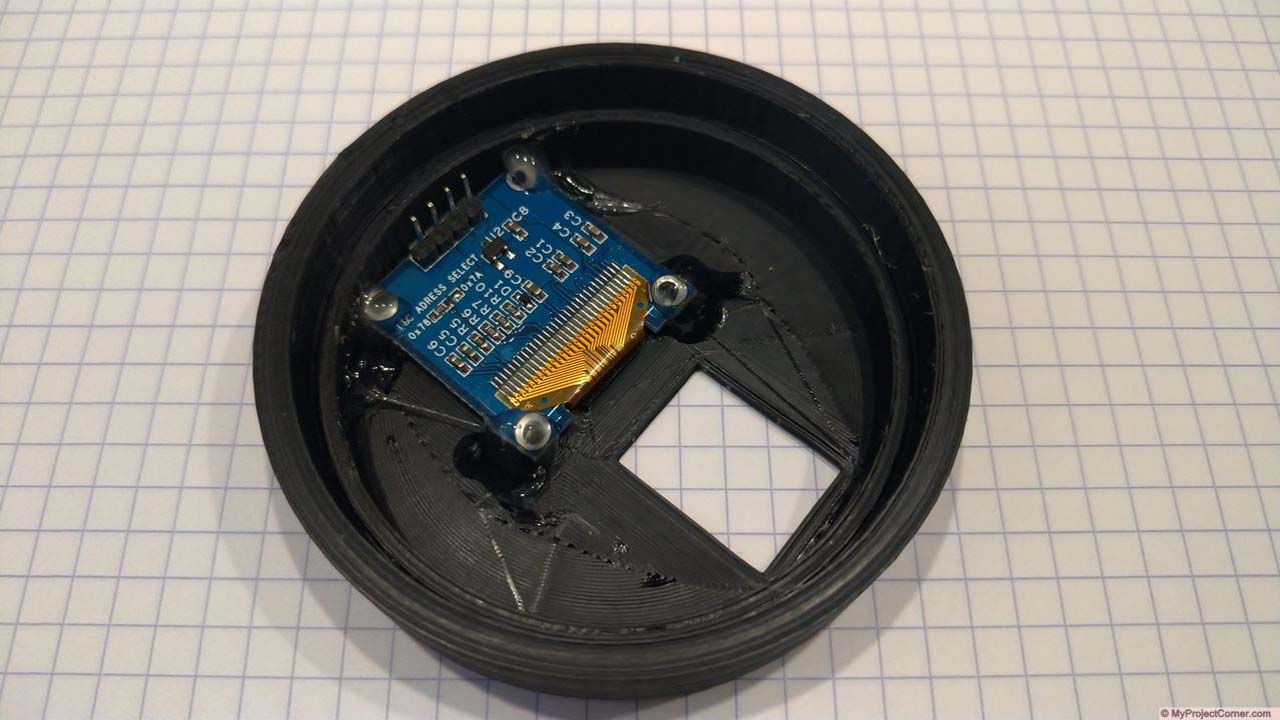
Start by gluing the display in place. There are location pins in the print (but they don’t always line up very well)
It is necessary to cut off the tab on the DHT22 sensor to allow it to fit in the case
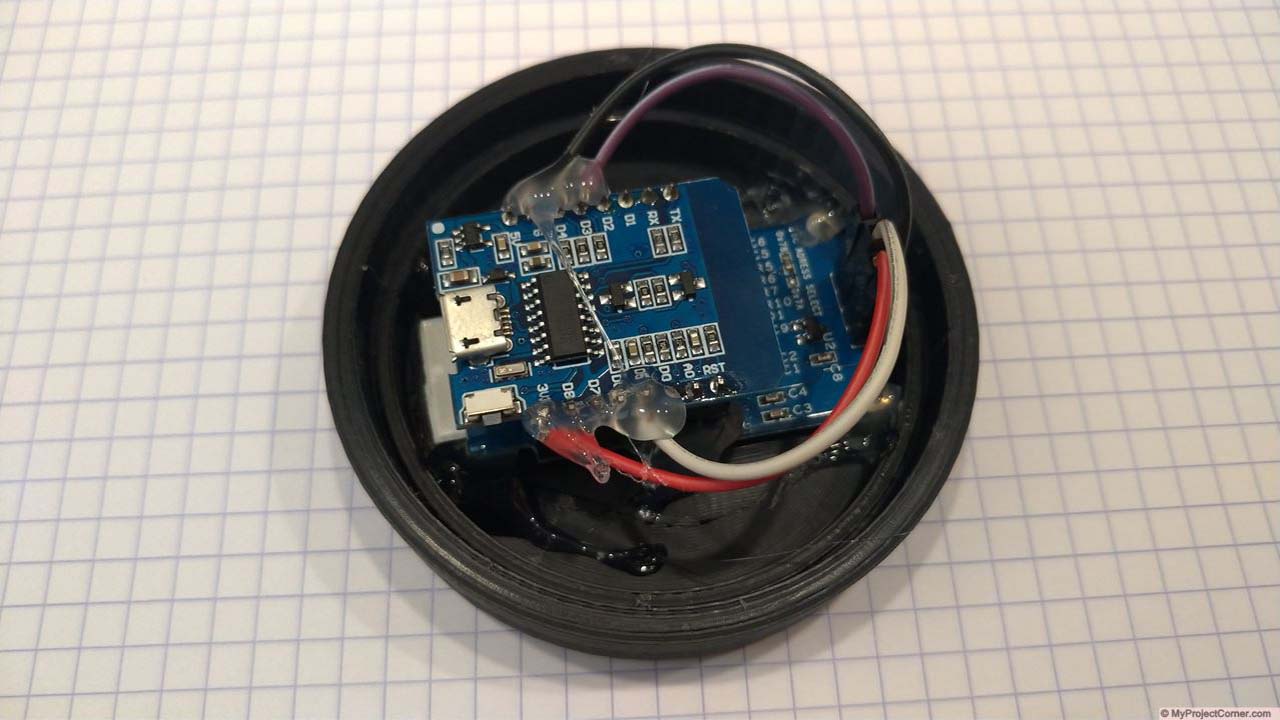
Then insert the D1 mini and DHT22 assembly, be sure to use a blob of hot glue to ensure a gap between the DHT22 shield & the display.
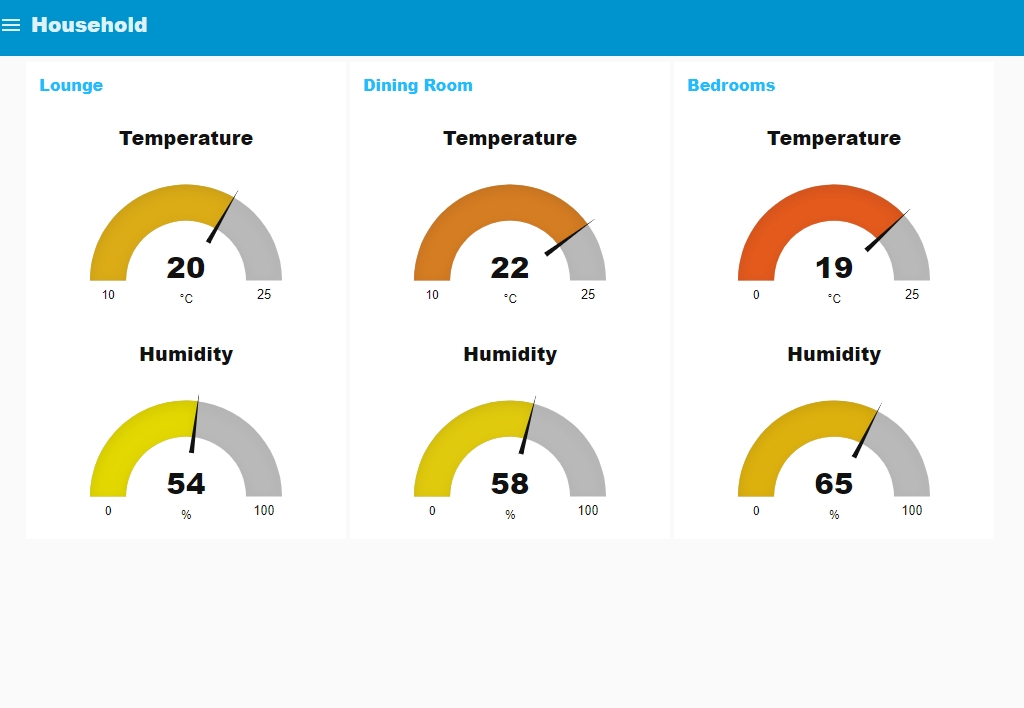
Node Red Dashboard
At present I only use these to have an idea of the temperature & humidity throughout the house, the goal is to eventually use to open and shut the underfloor heating circuits.