Portable temperature sensor using ESP8266, MQTT & Node red
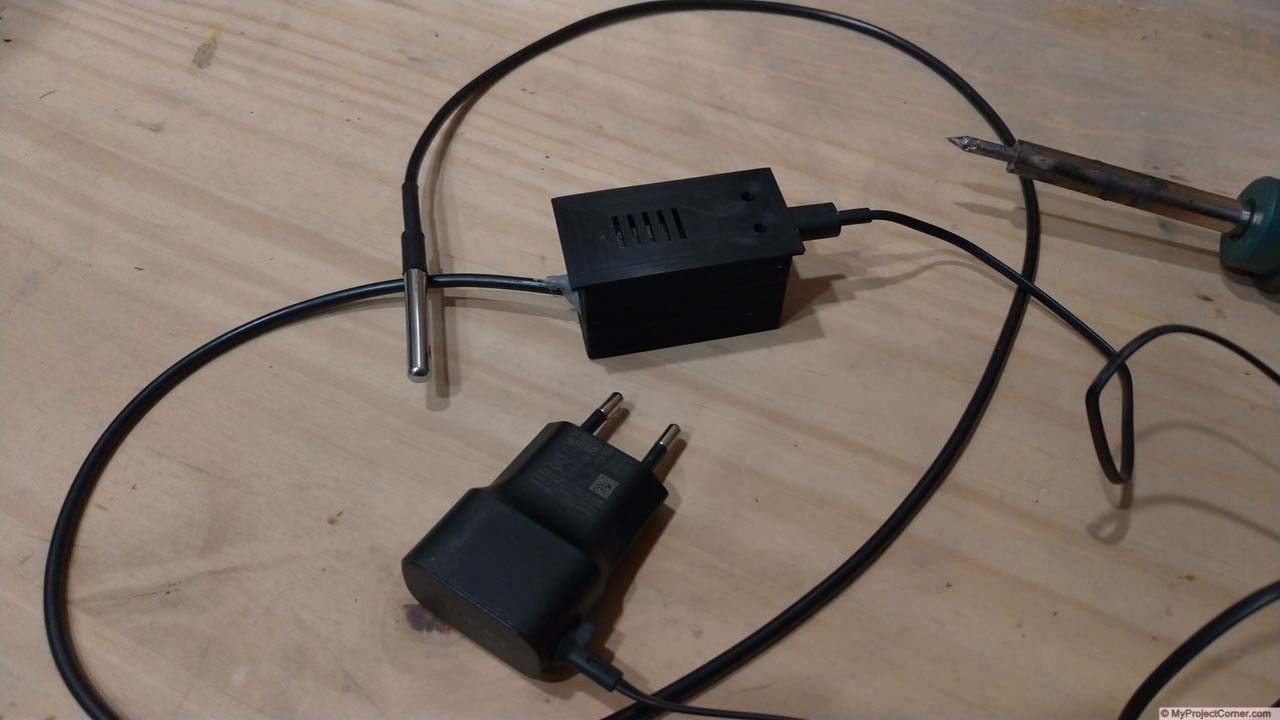
A portable temperature sensor built using a ESP8266 microcontroller board and a DS18B20 waterproof sensor. Housed in a 3D printed box of my own design.
When powered up the ESP8266 connects to Wifi first and then connects to the MQTT server on my Raspberry Pi. Once connected a message is sent at regular intervals with the temperature reading.
Parts to make the ESP8266 temperature sensor
- ESP8266 microcontroller
- DS18B20 waterproof temperature sensor
- 4.7K resistor
- 3D Printed box
- 5v power supply
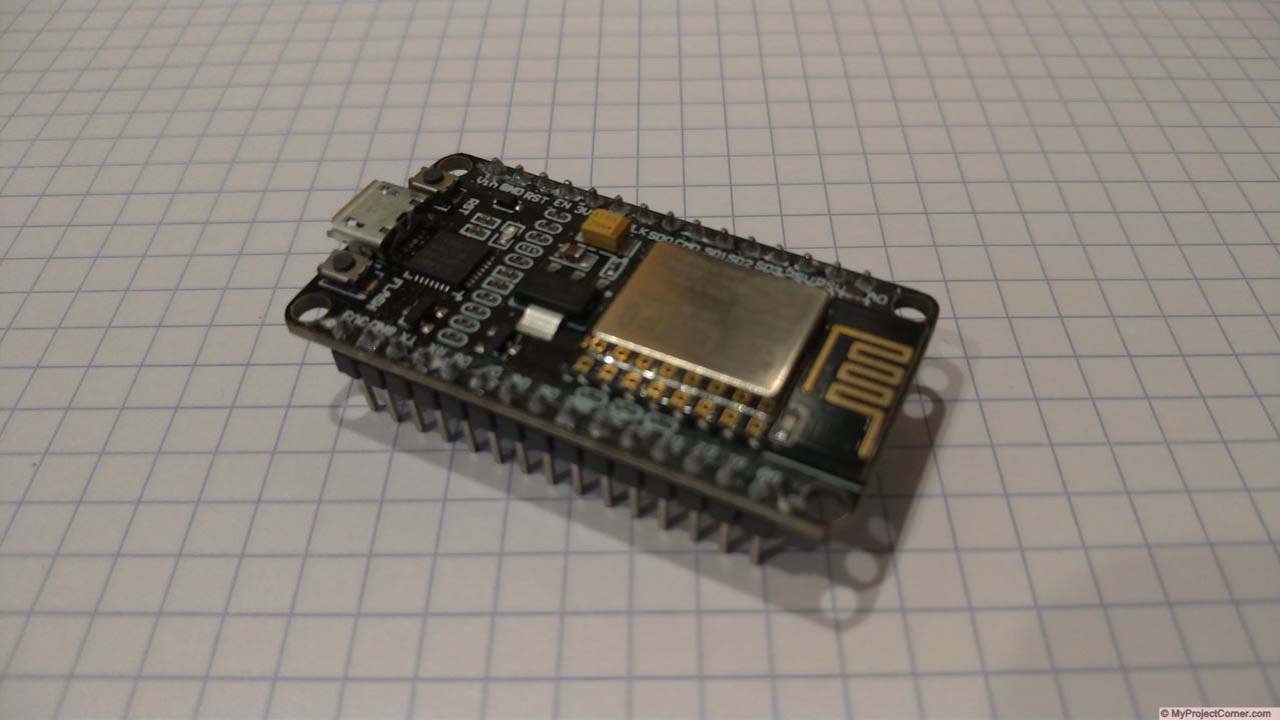
ESP8266 board

DS18B20 waterproof temperature sensor

Assembled portable temperature sensor
Design and Printing
Using SketchUp and my 3d printer
The housing design for the esp8266 board was modelled in SketchUp. I’ve tried to keep it as compact as possible while still allowing space for the wiring.
Printed in PLA with 20% infill and support for the cut outs.
The design and print files can be found on Thingiverse

Assembling
Soldering the connections

I’ve soldered the DS18B20 wires directly to the pins of the ESP8266 for ease,
- Solder the red power wire to 3.3v pin at the same time soldering one end of the resistor to the same pin.
- Solder the black ground wire to the GND pin.
- And finally, connect the yellow data wire to D4 (GPIO2), again soldering the resistor at the same time.
And that’s it for the assembly!
I added a bit of hot glue to the terminal connections for insulation and corrosion protection. And a dab around the wire entry hole.
Final stage
Upload the code
Add the code to the finished unit
Copy the code below and paste in the Arduino IDE. Change the wifi connection details to your own wifi network. Also set the IP address of the Raspberry pi running the mqtt server.
You will also need the relevant board and support libraries:
- ESP8266 board support library
- Dallas Temperature library
- OneWire library
- Mqtt support library
These can be easily installed via the ‘manage libraries’ option inside the Arduino IDE
#include <ESP8266WiFi.h>
#include <PubSubClient.h>
#include <OneWire.h>
#include <DallasTemperature.h>

// Data wire to pin D4 on the ESP8266 - GPIO 2
#define ONE_WIRE_BUS 2

// Setup oneWire
OneWire oneWire(ONE_WIRE_BUS);

// Pass our oneWire reference to Dallas Temperature.
DallasTemperature DS18B20(&oneWire);
char temperatureCString[7];
char temperatureFString[7];

// Change the credentials below, so your ESP8266 connects to your router
const char* ssid = "YOUR WIFI SSID";
const char* password = "YOUR WIFI PASSWORD";

// Change the variable to your Raspberry Pi IP address, so it connects to your MQTT broker
const char* mqtt_server = "YOUR PI IP ADDRESS";

// Initializes the espClient.
WiFiClient esp_temp_portable;
PubSubClient client(esp_temp_portable);

// This connects your ESP8266 to your router
void setup_wifi() {
  delay(10);
  // We start by connecting to a WiFi network
  Serial.println();
  Serial.print("Connecting to ");
  Serial.println(ssid);
  WiFi.begin(ssid, password);
  while (WiFi.status() != WL_CONNECTED) {
    delay(500);
    Serial.print(".");
  }
  Serial.println("");
  Serial.print("WiFi connected - ESP IP address: ");
  Serial.println(WiFi.localIP());
}

void getTemperature() {
  float tempC;
  float tempF;
  do {
    DS18B20.requestTemperatures();
    tempC = DS18B20.getTempCByIndex(0);
    dtostrf(tempC, 2, 0, temperatureCString);
    tempF = DS18B20.getTempFByIndex(0);
    dtostrf(tempF, 3, 2, temperatureFString);
    Serial.println(temperatureCString);
    delay(100);
  } while (tempC == 85.0 || tempC == (-127.0));
}

// This functions reconnects your ESP8266 to your MQTT broker
void reconnect() {
  // Loop until we're reconnected
  while (!client.connected()) {
    Serial.print("Attempting MQTT connection...");
    if (client.connect("esp_temp_portable")) {
      Serial.println("connected");
      // Subscribe or resubscribe to a topic
      // You can subscribe to more topics (to control more LEDs in this example)
      client.subscribe("portable/temp1");
    } else {
      Serial.print("failed, rc=");
      Serial.print(client.state());
      Serial.println(" try again in 5 seconds");
      // Wait 5 seconds before retrying
      delay(5000);
    }
  }
}

void setup() {
  Serial.begin(115200);
  setup_wifi();
  client.setServer(mqtt_server, 1883);
  //Turn off wifi access point
  WiFi.mode(WIFI_STA);
 }
// ensures that you ESP is connected to wifi and mqtt broker
void loop() {
  //connect wifi if not connected
  if (WiFi.status() != WL_CONNECTED) {
    delay(1);
    setup_wifi();
    return;
}
  if (!client.connected()) {
    reconnect();
  }
  if(!client.loop())
    client.connect("esp_temp_portable");

  getTemperature();
  client.publish("portable/temp1",temperatureCString);
  delay(10000);
 }
All that’s left is to set up the MQTT input flow in Node Red and plug in the unit.
One use for the temperature sensor
Monitoring how well my compost pile is working
I’ve got one of these attached to a metal electric fence post, push it into the compost pile and plug into a phone charging battery. Logs the temperature to the node red dashboard on my MQTT enabled Raspberry Pi.


Below is a screenshot of the node red dashboard. It shows the ESP8266 temperature sensor reading and a history in graph form.

Node red dashboard for portable ESP8266 temperature sensor
I have recently modified the design of the ESP8266 temperature sensor to add a second DS18b20. This one is used to monitor water temperature input/output for my underfloor heating system.